Category Archives: Label Printers

L801 Full-Bleed Label Printing

While attending the recent Afinia reseller meeting, I learned about a relatively new feature built into the L801 printer driver, which makes full-bleed printing relatively easy.  Let me tell you more.


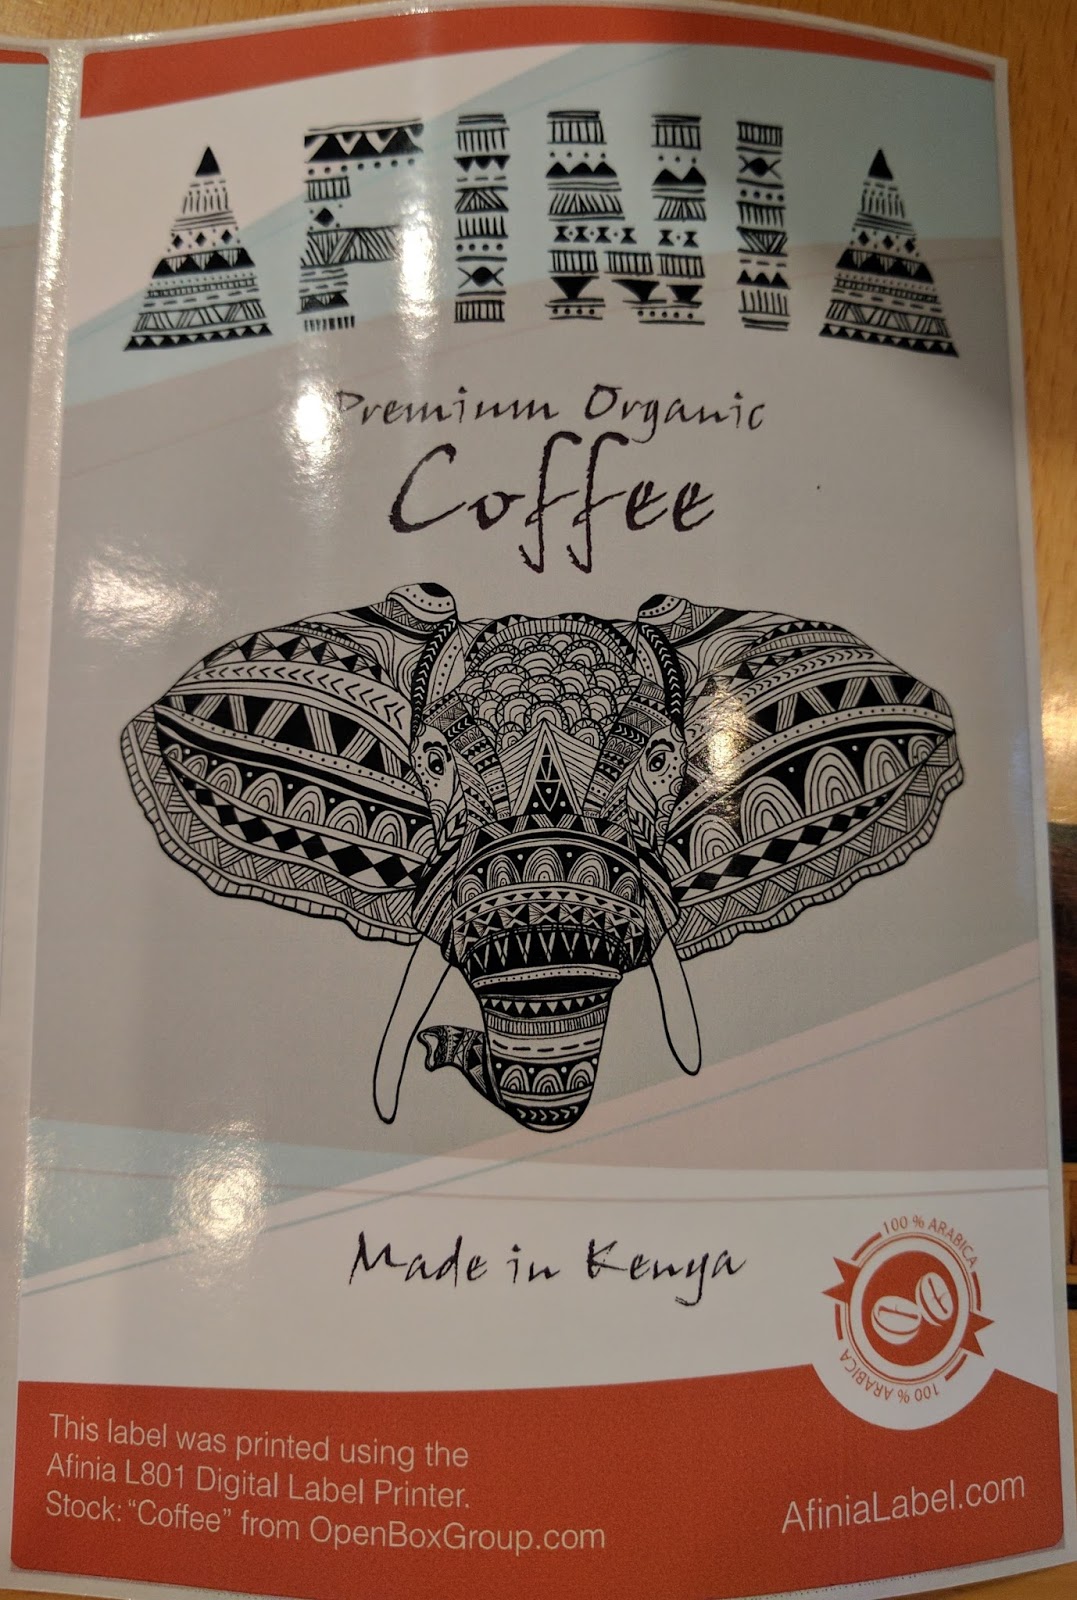
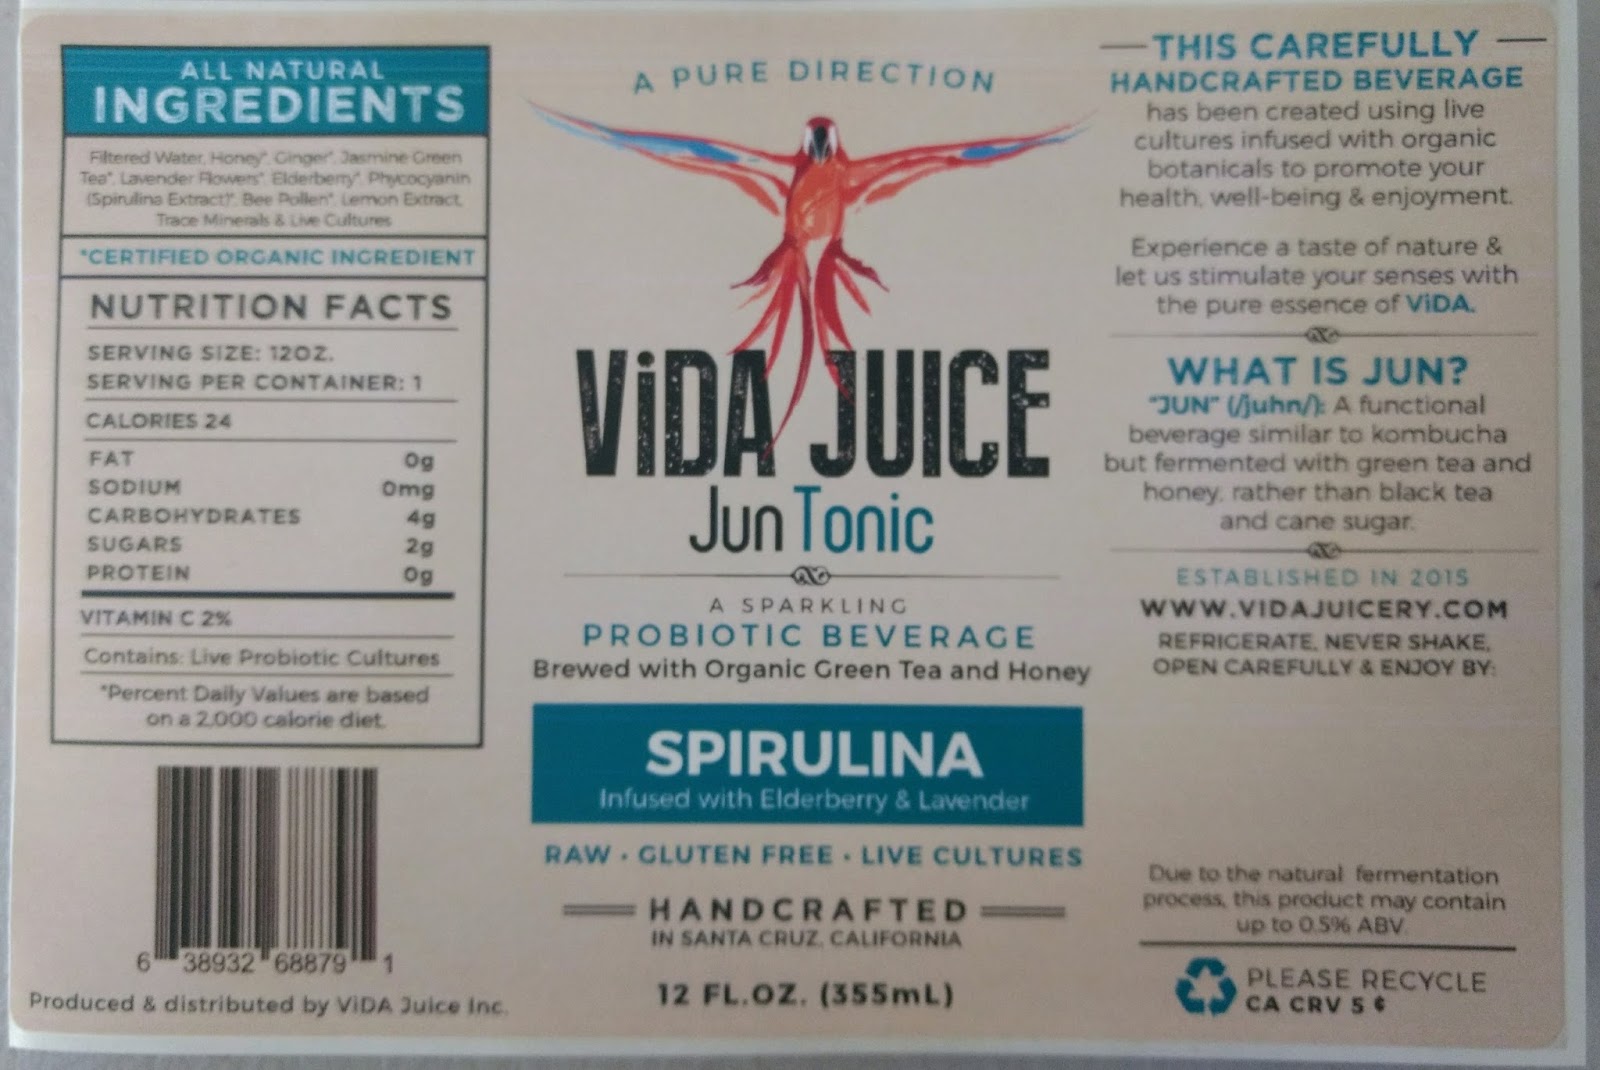
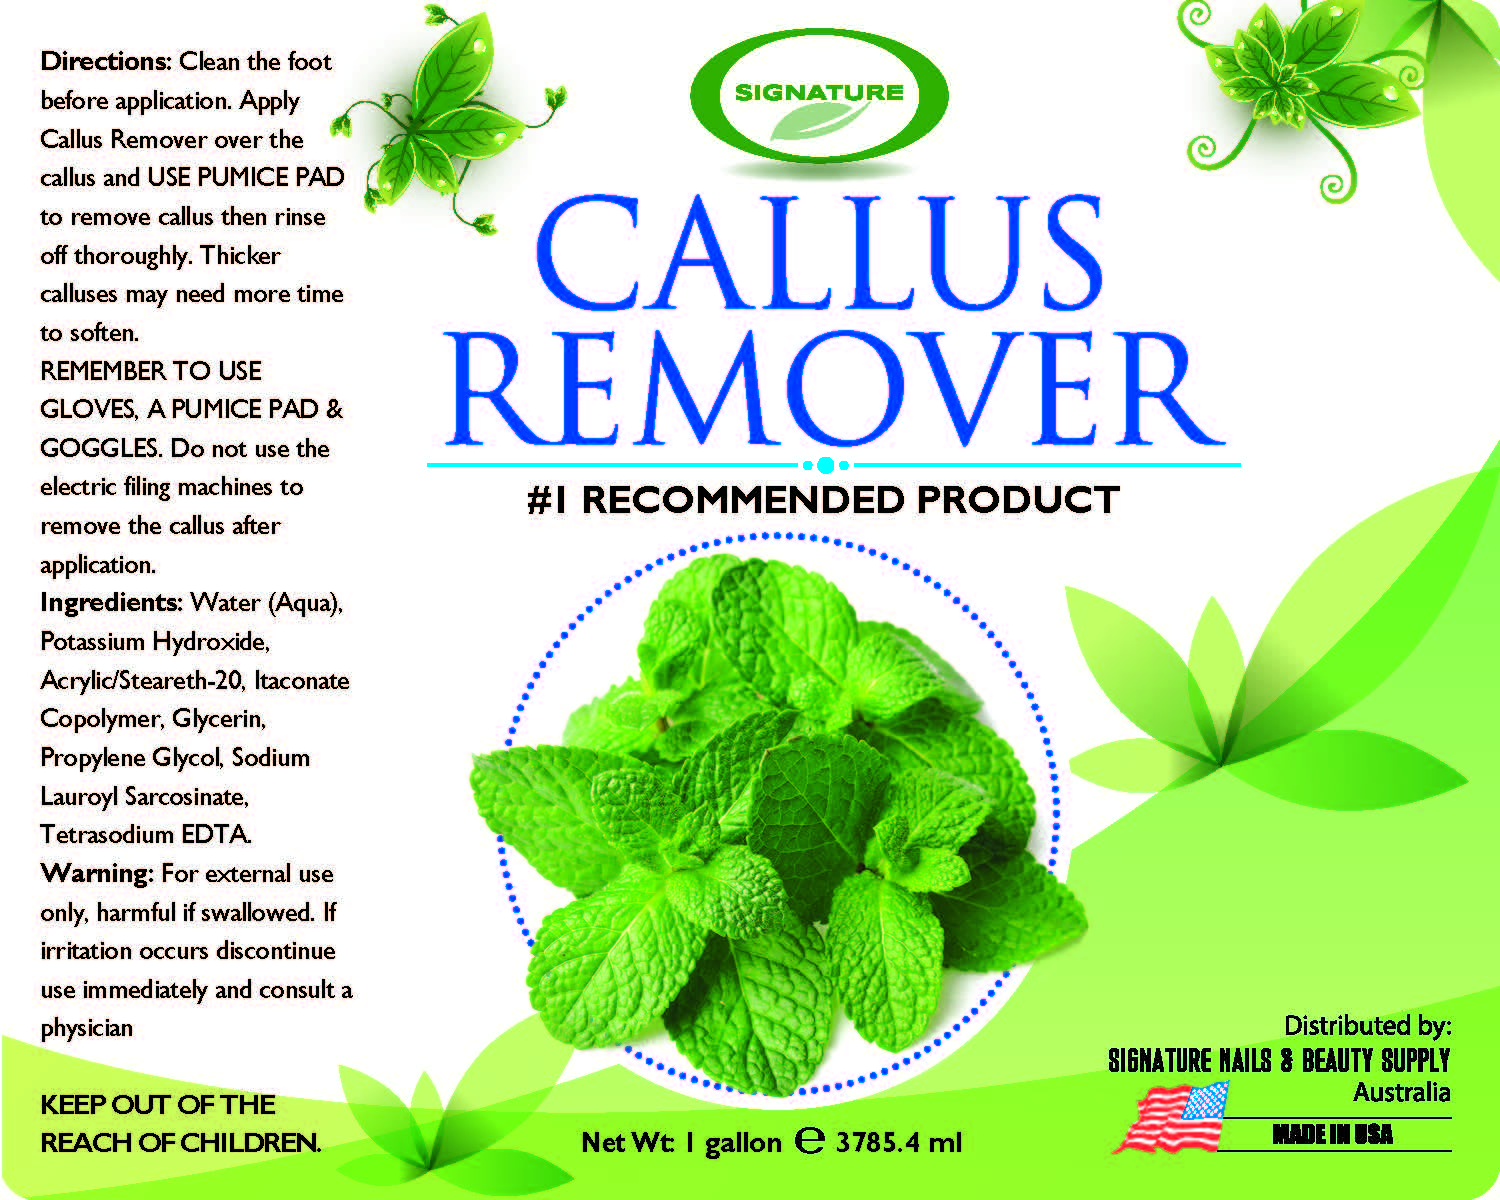
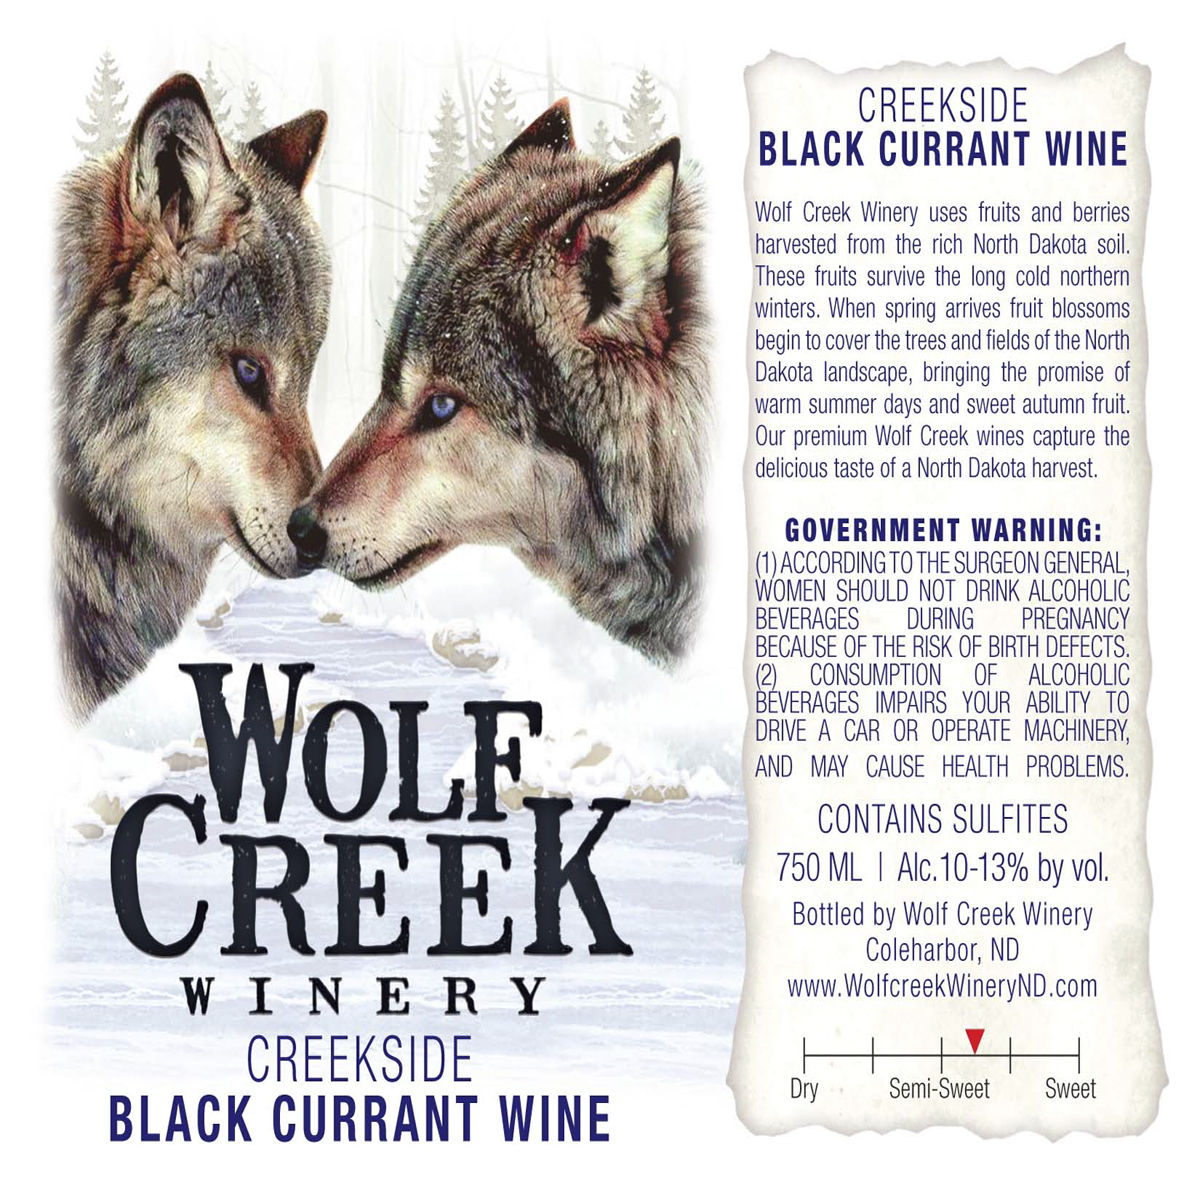
L801 Full-Bleed Printed Label
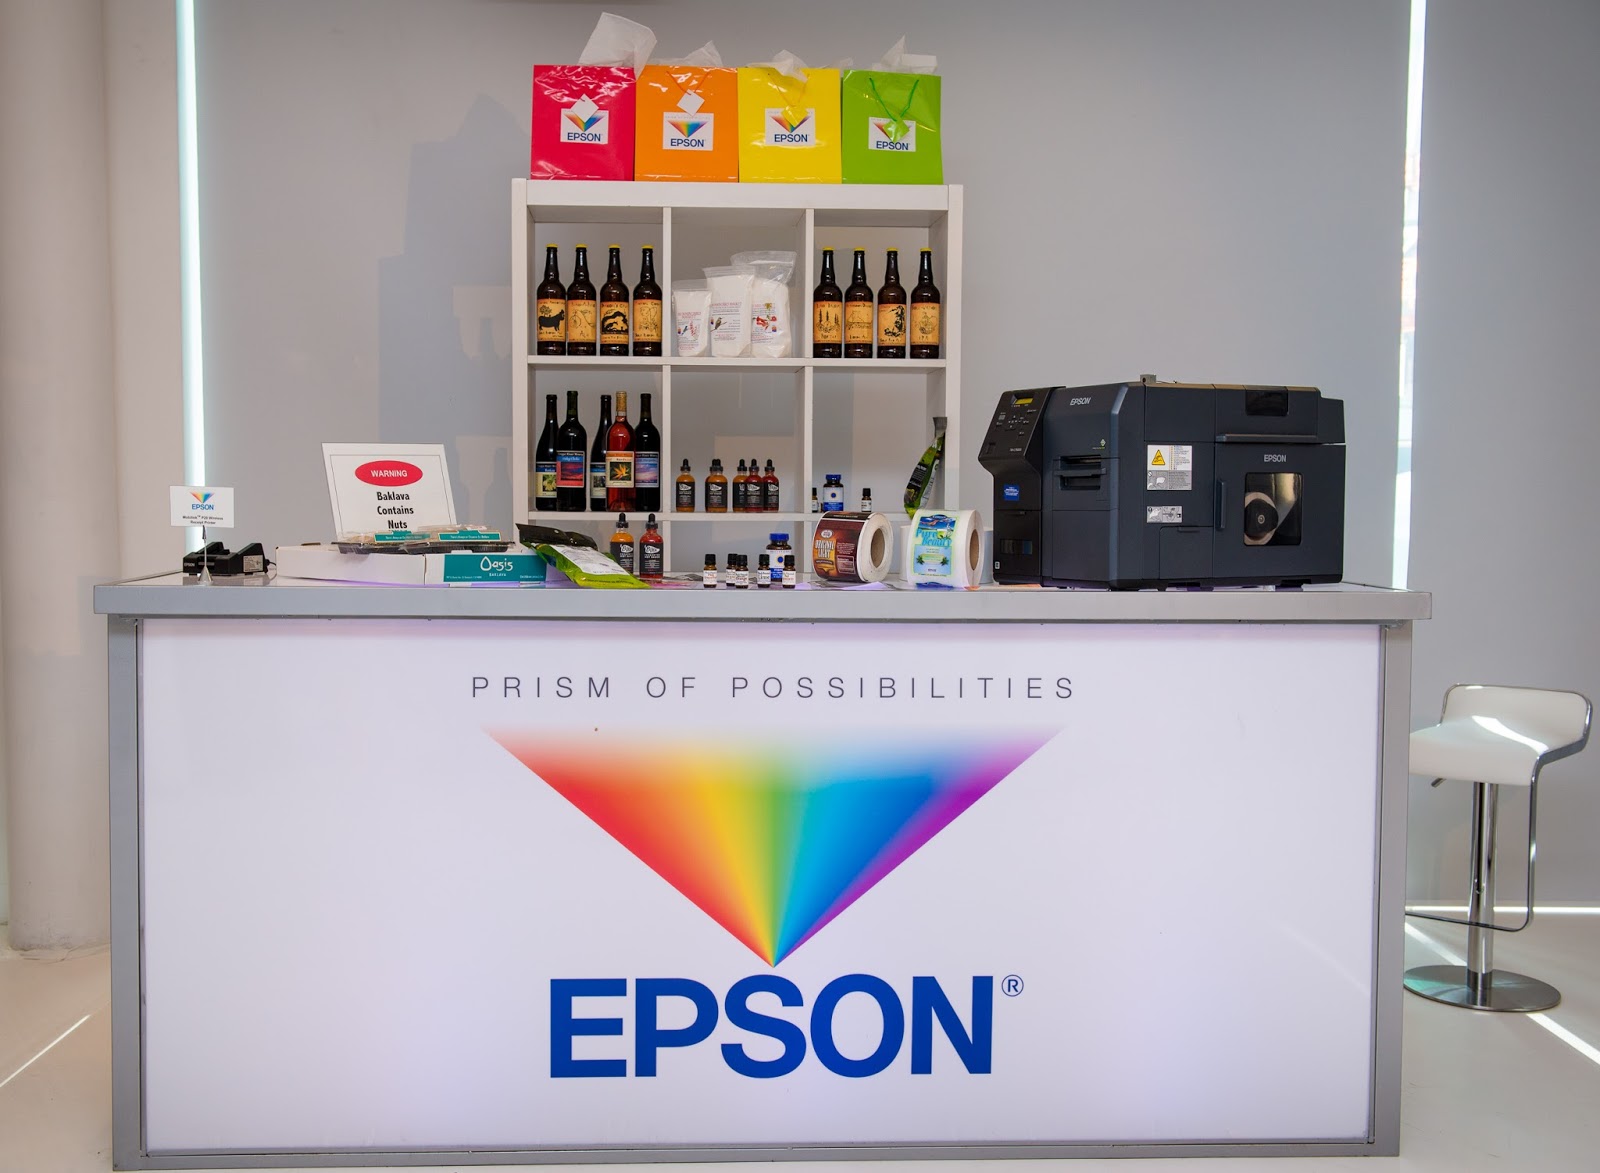
If this company is new to you, Afinia Label (www.afinialabel.com) was founded in 2009 to offer specialty printing solutions with best-in-class support at accessible prices. Their parent company, Microboards Technology, has been offering media duplication products since 1989. This background gives Afinia a rock-solid foundation of technical expertise, and decades of experience providing the best possible customer service.  
In the past, I’ve written about one of their new products, the L301:  

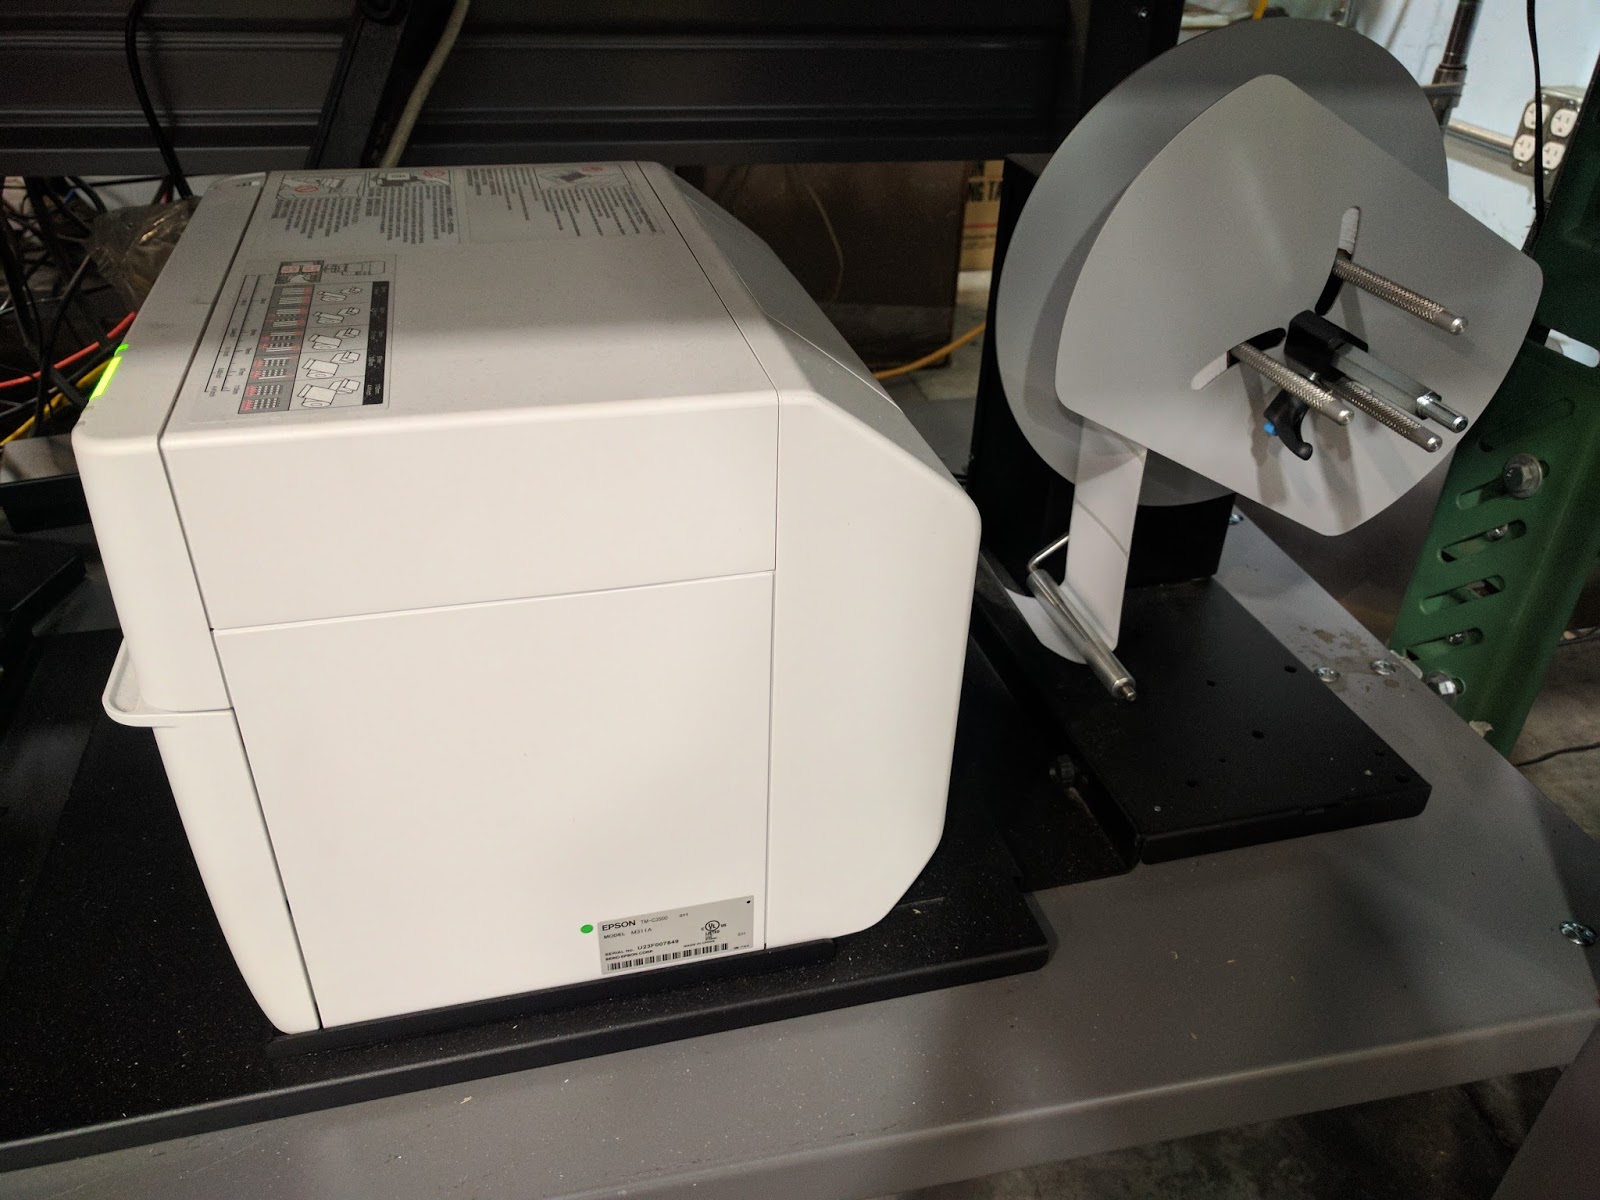
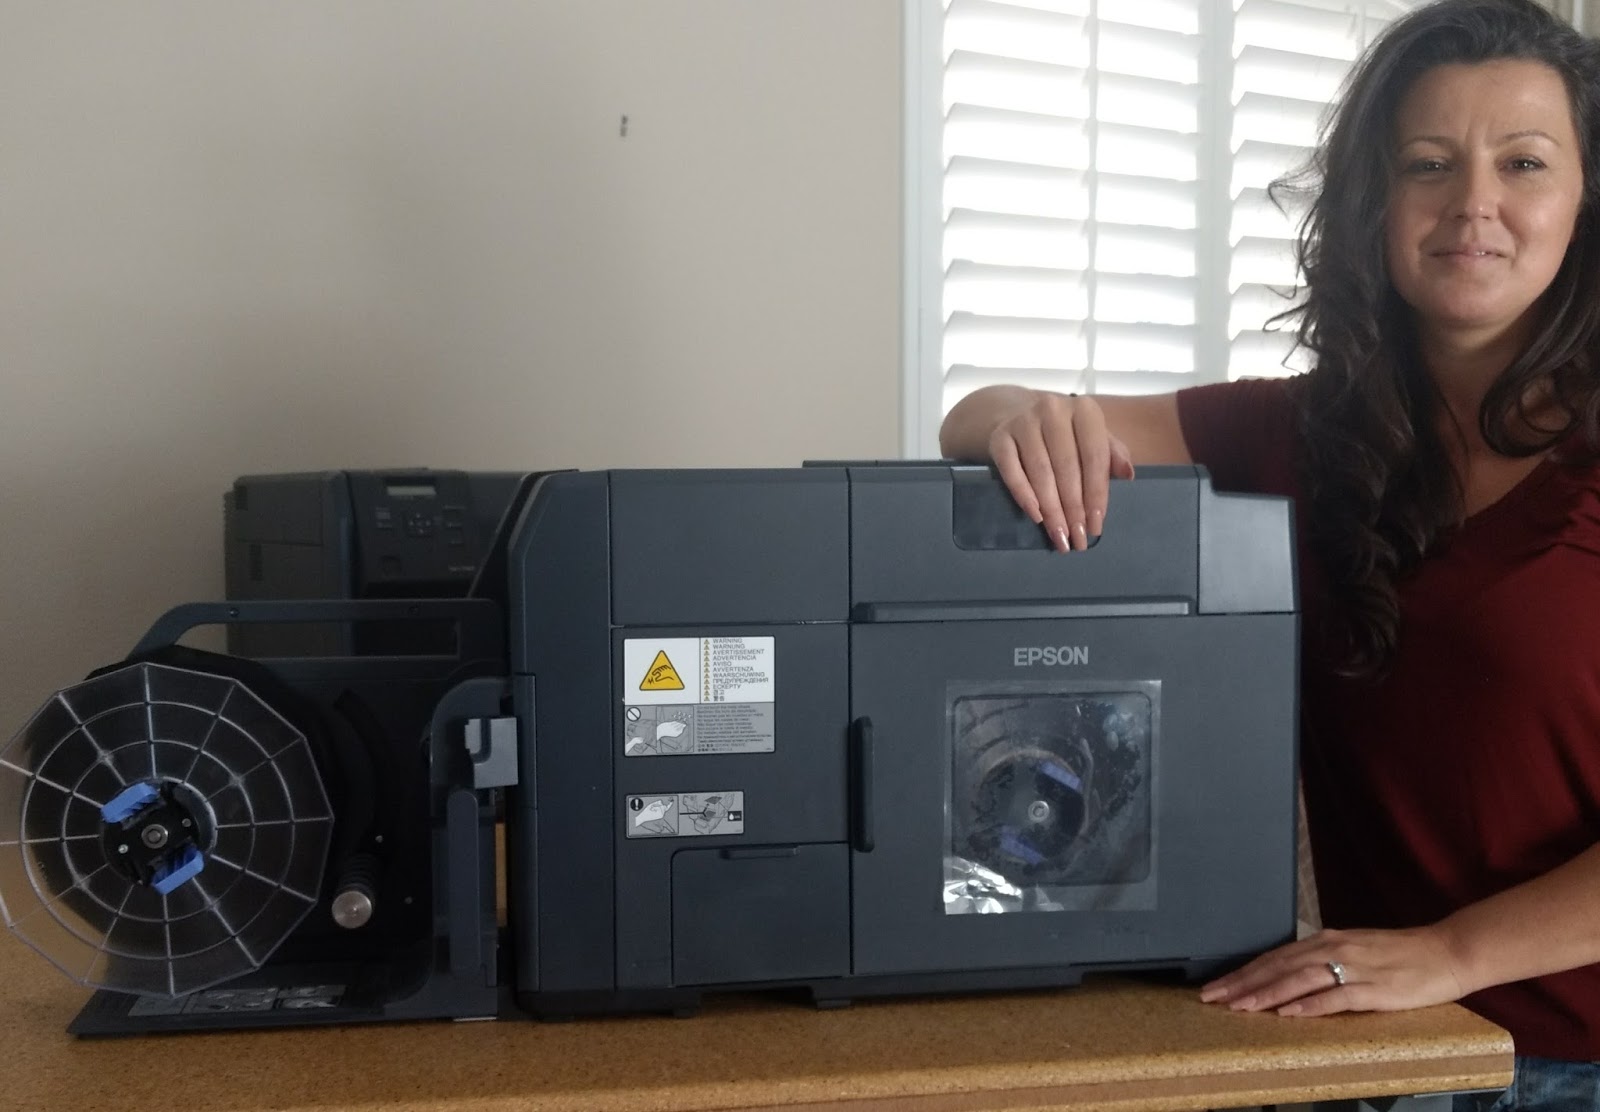
and we’ve sold some of their other products.  Afinia’s major product is the L801 which uses the Memjet print engine:

The L801 prints beautiful labels up to 8.5” wide; especially using the dye-based inks.  Although the dye inks are not sufficiently durable for many applications, they produce a very vibrant color, which is required for many prime label applications where many customers want to print full-bleed.
But full-bleed printing can be difficult on die-cut labels.  You must get some ink on the exposed liner; but not too much.  Too much ink on the liner may transfer to the label itself.  I written about full-bleed label printing in the past.  Here is a recent post covering full-bleed printing.


Now in the driver, Afinia has added to their driver controls that make it easy to print full-bleed labels.  To cover labels 100% with ink, you need to first know the orientation of the labels. To know the “language” that Afinia uses to describe the label orientation.

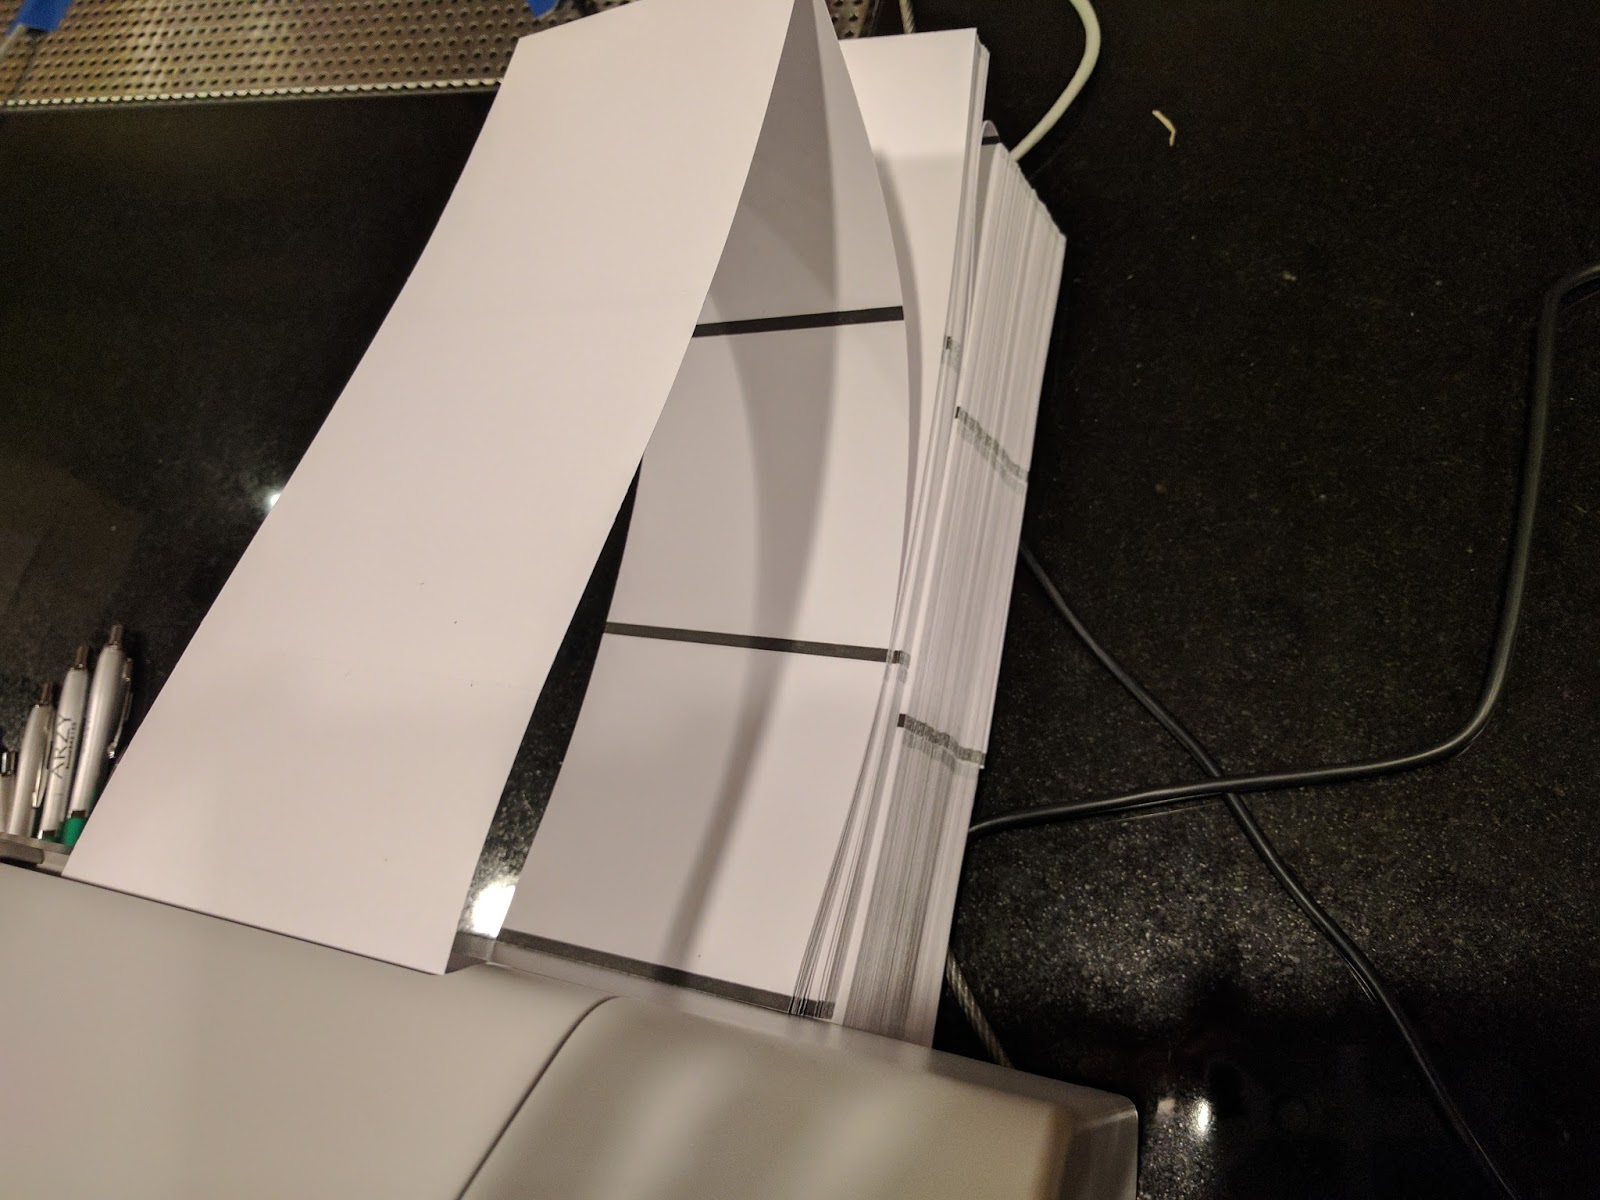
L801 Label Orientation
The leading edge of the label (the edge that comes out of the printer first) is described as the “Top”; making the trailing edge of the label the “Bottom”.  Standing behind the printer, you’ll find the “Left” and the “Right” edges.  When facing the printer, the left and right are reversed (naturally).
When printing full-bleed, Afinia recommends making the size of the label in the driver slightly larger than the actual label size.  I’ve used 0.03” as my standard recommendation since I’ve written this article on the LX2000:


Once the print size is set in the driver, Afinia recommends printing a few labels to examine the initial print output.  You need to ignore the first label, according to Afinia, to enable the settings to be completely implemented.
Once printing, you can see if the image need to move up or down; or right to left to better fit.  To move the image in the template, it’s simple to do using the position adjustment.

L801 Position Adjustment
The position adjustment provides the movement direction for positive or negative inches or millimeters you can adjust the image. This diagram makes it very simple to center the image correctly on the label.  Again the idea is to have only a very thin line of ink on the liner; covering the edge of the label completely.  Here is the setting we used during our training:

L801 Position Adjustment
Once this setting is establish, Afinia recommends printing a few more labels.
If you still have an edge or two that is still slightly off, you can make an “offset” adjustment on a single edge.  This setting basically stretches the edge slightly; just enough to eliminate a thin ribbon of white label showing; or to reduce the overprint slightly.  Again, here is my setting during training:

L801 Offset Adjustment
It’s a genus idea that makes printing full-bleed easier to do.


According to Mike Atkins, National Sales Manager for Afinia, “The low cost of ink and great quality of color output from the L801 has made it one of our most popular options for prime label applications. However, printing edge-to-edge has certainly presented a challenge to users in the past. These latest updates in the driver have opened up what our customers can do with the L801, and the response has been overwhelmingly positive.”
If you need to print full-bleed labels; but don’t want to spend a lot of time adjusting the print, contact us to help you with the L801 color label printer from Afinia.
Guy Mikel
855-962-7670

On-Demand Color Badges

Founded in 1976, CompuSystems (https://www.compusystems.com/has enjoyed many years as a major registration service provider for the trade show industry. They offer integrated software that meets the specific needs of their clients, creating an ecosystem that fosters the buyer and seller relationship.

Their goal is to establish long lasting relationships with their clients based on trust, a shared success and a commitment to quality. Their vision is to have every customer recommend CompuSystems. To succeed, CompuSystems is dedicated to making investments in quality products and services to support their customers now and in the future.


When Jeremy Kubik, Director of IT for CompuSystems, and I first communicated, he was looking for an alternative to the Xerox Color printers they were using.  Jeremy said, “We’re looking for an alternative to the Xerox sheet fed printer.  We want to use some type of continuous badges; many of our badges are 4” x 12”.  In addition, we need a smaller footprint as our registration desks have limited space.  Plus we need to have the capability to print on-demand and in color.”
Based on our discussion, I sent samples of both 10 mil paper and 8 mil poly badges designed to work in the C3500.  The poly material is more expensive than the paper; but prints great and is very durable.  Ink costs are less, generally, compared to laser..  On the sample artwork provided by Jeremy, I estimated the ink cost for the C3500 printer at $0.049/badge.  Not bad for a 12” tag.

4
4″ x 12″ Badge Ink Cost-C3500
As CompuSystems consider alternatives, I found a new 8 pt tag paper tag material that was stiffer and printed great.  Plus this material was very affordable.  With this new material, Jeremy created a new 12” tag design, set up to print 2, 4” x 6” badges separated by a crease.  With this design, the C3500 can print a two-sided badge.

4
4″ x 12″ Badge Design
Based on the available materials, running costs and printer cost, CompuSystems purchased C3500 printers for their badge printing.

C3500 Badge Printers
Even more interesting to me, is how CompuSystems deployed the printers in an overall solution.  First, how the printers were deployed.  According to Jeremy, “to install and configure the printer drivers, I figured out how to accomplish this task via a batch mode.  This step was important as every badge pickup desk at each event uses a different server.  The batch driver deployment makes it easy for us to set up an event.”

C3500 Badge Printers
In addition, CompuSystems uses BarTender to create the templates and print badges.  According to Jeremy, “we use BarTender to print our badges.  Our Unix-based registration application looks up each person in the database and “prints” via port 9100 to the local BarTender server.  BarTender then adds the variable information to the template to create each individual badge.  We’re printing hundreds or even thousands of badges at a time with variable information.   All that information is then synchronized with our main servers.  BarTender works great for us.”

BarTender Badge Printing
C3500 Badge
C3500 Badge

Jeremy and CompuSystems has built a great solution for printing color badges on demand using the C3500 printers and BarTender.  Jeremy says “we’re very happy with the performance of the C3500 in our first event.  They’re working great; printing very fast.  We especially like the short time to first print.  Plus the print quality is sufficient for our situation.”
In addition, we’ve found badge material, both paper and poly that print great and is affordable.

Fanfold Badge Tags
If you need to print event badges, contact us.  We’ll help you move to printing color badges on-demand, saving you time and money.
Guy Mikel
855-962-7670

Perfect Print On-Demand Color Label Example

Founded in 1987 as a local wholesaler of products for the cabinet and furniture trades, QuickScrews International Corporation (www.quickscrews.com) has evolved into the supplier of the most popular brand of fasteners in the industry; including their new solar division (https://solarroofhook.com/).   Their highly trained and experienced personnel are ready to discuss their customer’s needs to deliver on the promise “Get the Screws You Need Faster Than Ever”. QuickScrews uses technology to service many different categories of customers; from weekend warriors looking to finish a project, large cabinetmakers or solar roof installers, or wholesalers looking to support their customers. In 2010, QuickScrews began selling their products online, which expanded their customer base to more than 10,000 customers and shipping orders within 24 hours of receipt.


From my perspective, QuickScrews is the perfect example of a company needing to print color labels on demand.  With thousands of SKU’s, QuickScrews uses colors and icons to differentiate types of fasteners. With their solar products, here are their color codes:

QuickScrews Color Codes
And here are icons in use on one of their products:

QuickScrews Variable Icons
Quickscrews prints these labels using the C3500 in stations distributed in their plants in Livermore, CA and in South Carolina.


And they have experimented using a very inexpensive Go-Dex unwinder to feed large rolls of labels into the C3500.  And it works seemingly great!

C3500 with Inexpensive GoDex Unwinder
But the real magic of the QuickScrews print on-demand color label solution is their database of products and their deployment of BarTender.  According to Mark Buechler, Senior IT Manager for QuickScrews, “our Marketing department has spent a lot of time gathering information and taking pictures of many different fasteners for our database.  We’ve worked hard not only setting up the structure of our database in Excel, but also adding the descriptors, color codes, and variable images associated with every single SKU we sell. It’s a process that will never end”.
In addition to the database, Mark has deployed BarTender, designing different label templates and setting up the network to pull the variable data, including the different text descriptors, icons and color codes to create the labels.  According to Mark, “now each print station in either CA or SC accesses BarTender to print the labels required for each product.   This solution makes it easy for our operators to label our products correctly.  And the colors and icons make it easy for our wholesalers and customer to select the correct fastener.”
According to Elizabeth Sinclair, Manager, Verticals Marketing at Seagull Scientific, the creator of Bartender, “by using good data management practices in your labeling deployment as demonstrated by Mark and the Quickscrews team, you can create enterprise-wide efficiencies that save time, resources and money. Many companies use only the design component, and thus store data in label files. By integrating BarTender with a trusted data source, any changes are easy to make in one location rather than finding, opening, updating and saving every individual label.  QuickScrews has deployed BarTender very effectively.”
Quickscrews has developed a great business model; becoming the subject matter expert in a relatively narrow field.  This focus makes it easy for prospects and customers to purchase the correct fasteners.  By adding a great print on-demand color solution, QuickScrews can now produce labels that make their products easy to use; both their channel and end users.
If you have a large number of SKU’s and considering print on-demand color labels, contact us.  We’d love to help you build a great solution like QuickScrews.
Guy Mikel
855-962-7670

Easy To Do

Label printing can be difficult; I know.  But label printing can be easy if done correctly.  When the artwork matches the label size correctly, label printing is easy to do.

Nutriment.com (www.nutriment.combelieves that success in the nutrition business is predicated upon knowing what customers need to help optimize nutrient intake; and to help address specific health problems.  Nutriment.com has the distinction of offering formulations with the most comprehensive ingredients lists—highly potent formulations with nutrients chosen to work together so that the final effect is greater than the sum of its parts.
Joint health, male enhancement, vitamin/mineral blends and sleep aid formulations are just a few of the products they offer, and their list continues to grow. All ingredients chosen for these specific formulations are only the purist, highest in potency and scientifically validated by clinical research.  Nutriment.com uses only GMP (Good Manufacturing Practice) certified facilities to produce its formulations. This requirement assures a safe and pure product that you can take with confidence.
When first contacting Peter Baker, Owner of Nutriment, I learned he needed a printer for producing short runs of labels for new products.  “We launch new test products all the time,” said Peter.  Continuing, “Some of these new products generate demand; some don’t.  Once I have a large demand, we’ll purchase preprinted labels.  Until we have a winning product, we don’t want to purchase a large supply of labels that may never be use.”

Given that Nutriment needed to produce a limited run of labels at a time, I offered to send samples from both the C3500 and C7500G printers.  The C3500 is a very affordable label printer; the C7500G has much higher print resolution.  We discussed also the L301 (http://colorlabelsondemand.blogspot.com/2017/02/l301.html)  and the LX2000 (http://colorlabelsondemand.blogspot.com/2015/06/lx2000-full-bleed-color-label-printer.html) as well.  But the ink costs would be higher to produce labels for these printers. For the Nutriment application, the C7500G was the best choice.

To produce these samples, Peter sent me artwork setup perfectly to work with a 2” x 6” label. 

Nutrient Label PDF
Nutrient Label PDF
Notice how the label is designed with the marks setting out the location for the corners of a 2” x 6” label.  When printing these labels at the “Actual” size using Adobe Reader or Acrobat, the preview shows exactly how the label will look.

PDF Label Preview
PDF Label Preview
For the most part, we don’t carry  inventory of labels required to print all the possible sizes and types customers would want.  But in this case, I checked with our plant, who happened to have a roll of 2” x 6” and 2.5” x 6” gloss poly labels in inventory.  So I agreed to print some test labels for Nutriment.
Once I received the labels from the plant, I printed 7 different labels.  On the first label, I found that I had to move the print slightly down and change the boarder setting to .06” to get the label to print exactly as required.

Label Horizontal Adjustment Example
We then packaged up the test prints and sent to Peter.

Nutriment Label Prints
With the correct artwork and label sizes, printing great looking labels is easy to do.  Perfect for an application such as desired by Nutriment, printing labels as need for their prototype products.  Companies launching new products all the time like Nutriment, printing on-demand color labels make good economic sense.
If you want to produce great looking labels easily yourself, contact us.  We’ll help you get started printing labels quickly and easily.
Guy Mikel
855-962-7670

BenchMax

BenchMax Label Applicator (https://greatengineering.com/benchmax/)  will enable you to use any label (or 2) on any round container larger than 8 mm in diameter.  With the Small Container Adaptor, the BenchMax makes it possible to label containers down to 8 mm in diameter.  And the Orientation capability scans the container for a feature, to insure labels are applied in the correct orientation.  Finally, you can adjust the rollers to apply labels to round containers with ridges or other features.

BenchMax Label Applicator


More important to me, however, was the fact that you can now integrate the BenchMax into the C3500 and C7500 for on-demand color label printing and application.  This capability makes the BenchMax the only off-the-shelf label applicator available for integration with a color label printer.  I first wrote about this capability after WestPack 2017: http://colorlabelsondemand.blogspot.com/2017/02/westpack-2017.html

When I received my BenchMax, I was pleasantly surprised how well the unit was packed for it’s shipment from Australia to the US.


After unpacking the BenchMax applicator, I attempted to thread the supplied labels through the machine.  You can download the directions here: https://greatengineering.com/pdf/BenchMAX_BenchMARK_Manual.pdf 

And be sure to watch this video on setting up the BenchMax first.  It’s important and helpful:

As the machine ships with the small container adapter in place, I made a mistake on the threading.  Therefore, I decided to remove the small container adapter before moving forward.

BenchMax Small Container Adaptor
BenchMax Small Container Adapter
But I had a heck of a hard time removing the adapter.  To remove the adapter, you need to remove the Hex screw shown below and the knob. 

Small Container Adapter Screw
When I tried to remove the screw, the adapter would turn, and not release.  I believe this problem says more about my mechanical skills than the adapter.  Once I held the adapter with the palm of my hand, and turned the Allen screw, the came off.  With the adapter off, it was easy to thread the labels through applicator.
After threading the labels, I had to set the gap sensor.  Frankly, I made a mistake in this step as well.  I could not get the provided labels to apply correctly. You need to make sure the sensor is positioned off a few mm from the leading edge of the first label.  This position below worked great.

BenchMax Label Leading Edge Exposed
BenchMax Label Leading Edge Exposed & Sensor Setting
And found the top of form on round labels as well:


Once I got the sensor set correctly, I was labeling containers. Even applying two labels to one bottle.


(Note to self: get some nice looking, unused round containers).
The BenchMax makes placing two labels with the correct spacing on one bottle easy to do.
After figuring out the applicator portion, I integrated my C7500G with the BenchMax.  Following the instructions for the Interface was easy; get the instructions here:  https://greatengineering.com/wp-content/uploads/2017/03/interfaceInstructions.pdf

And the included label guide instructions as well: https://greatengineering.com/wp-content/uploads/2017/04/GuideInstructions.pdf

I thought the label guide worked well; and may work better using fanfold labels:

BenchMax Label Guide
And in minutes, I was printing and applying labels to large containers.


And by reinserting the Small Container Adapter, I was printing and applying labels to smaller round containers:


And here you can watch the printer respond to the commands from the interface:


When you first start to integrate the printer/BenchMax, be sure to print 15 to 20 labels to have lots of slack in the system.  As the printer backs up when starting to print, you need approximately 10” to 12” of loose labels.  After printing this initial slack, the Interface does all the work.  And I confirmed, the Interface works with Adobe Acrobat and BarTender, making printing and applying labels with variable data easy to do.  Be sure to keep the software application open during application; so the Interface can continue managing the label printing.
If you own a C3500 or a C7500/C7500G and apply labels to a round container, you should consider purchasing a BenchMax label applicator.  Now, you can print and apply in one step; increasing productivity and insuring your labels are applied correctly in the exact position every time.  The BenchMax applicator with the Interface, Label Guide, Cables and freight costs approximately $10,000.
If you don’t own one of these printers, now you should consider purchasing both the printer and BenchMax applicator to improve your operations and look of your finished products.  Contact us to discuss how the BenchMax label applicator fits into your operation.
Guy Mikel
855-962-7670

Label Color Management-Reader/Acrobat

Color Label Solutions prints and send label samples out most days.  And I’d say most of these samples are printed from Adobe Acrobat in my case.  However, many of our customers print from Adobe Reader.  These customers create artwork in Adobe Illustrator, Photoshop or some other application before saving as a PDF.


While at a customer site this week, I decided to test some of the other Adobe Color Settings; as the colors in the initial print output were different from the C7500G versus the customer’s standard printer. By accident, I’ve found an additional way to improve color matching.  I’m sure many graphic artists understand these capabilities; but I did not.
In the past, I posted on using the ColorTone Matching assistant and/or the Wasatch RIP available in the C7500GE to improve color matching. 


But for many of you, selecting a different setting in Adobe Reader or Acrobat may give you “close enough” or sufficient color matching.  Let me explain further.
In the print dialog box of Adobe Reader, you can find the “Advance” button.

Adobe Print Dialog Box

In the Advance dialog box, you’ll find 3 basic options for color printing.

Adobe Reader
Adobe Reader “Advanced” Print Dialog Box

  • Let Printer Determine Colors Checked
  • Let Printer Determine Colors Unchecked (PDF Determines Colors)
  • Print as Image

In addition, you can select “Preserve CMYK Primaries” and “Preserve Black”.  However, I didn’t notice any difference with these selections alone.
With the above label artwork, I found a difference when printing as an image.  The green was darker, and maybe more yellow when printing using the setting “Print As Image”.

In Acrobat, I found Adobe provides many more options for color management; with 4 basic types:

  • Printer Color Management
  • Same As Source
  • Adobe Color Management
  • Print as Image

When Printer Color Management is selected, Acrobat says “Color Handling determines if color management will be used, and if so, whether it happens in the application or at the printing device. When ‘Printer’ is selected, convert any ICC profiles to PostScript CSAs, and color will be managed in the printer RIP.
With Same As Source is selected, Acrobat says “Color Handling determines if color management will be used, and if so, whether it happens in the application or at the printing device. When ‘Same as Source (No Color Management)’ is selected, embedded profiles are ignored, and only device values are sent.
When Acrobat Color Management is selected, Acrobat says “Color Handling determines if color management will be used, and if so, whether it happens in the application or at the printing device. When ‘Acrobat Color Management’ is selected, select an ICC Profile that describes the target output device.”
In my version of Acrobat, I count 42 different ICC profiles available when selecting Acrobat Color Management.  Although not printing using all of the available profiles (some are black/grey’s only), I did find differences. With most of the profiles, I did not see a difference using this artwork and label media.

Acrobat Color Management Profiles

Using ColorMatch RGB (Matches the native color space of Radius Pressview monitors.  This space provides a smaller gamut alternative to Adobe RGB (1998) for print production work), I found a darker green with this artwork.

Acrobat ColorMatch Profile
And I found the same print output using Apple RGB: (Reflects the characteristics of the average Mac OS monitor, and is used by a variety of desktop publishing applications, including Adobe Photoshop 4.0 and earlier.  Use this space for files that you plan to display on Mac OS monitors, or for working with legacy (older) desktop publishing files.)
In addition, I did see a difference by selecting “Printer Color Management”.  I’ve decided to make this setting the default.
For those of you printing with Adobe Reader or Acrobat, I encourage you to test your artwork with the variety of settings and maybe label media to see if you find a difference in color of your print output.  You may find a better color matching option.
And for those of you we’ve sent samples, forgive me if the color wasn’t exactly correct.  Maybe I could produce better color matches now.
Guy Mikel
855-962-7670

L301

I received my new printer the other day: the L301.

L301
L301
Selling at $1,595, the L301 is the lowest price 4+” color label printer available.  The ability to print up to 6” wide labels at this price point seems like a very interesting proposal for small label producers.  I wanted to try it; so here is my out-of-the-box report.
L301 Label Printer
L301 Label Printer
Prior to taking the printer out of the box, I realized that I could not install the driver.  I needed to get from Afinia a file of the driver to download.  At the time, the driver was not publicly available.  You can now download it here along with the instruction manual and quick start guide:


After unpacking, I started to install the printer by first plugging in the printer and installing the ink cartridges.  Immediately I found discrepancy with the ink cartridge numbers.  The manual called for Cartridges: #26548 and #26562. However the numbers on the bags were different.  In the production units, the part numbers will be on the cartridge outer packaging.  


After installing the ink cartridges, I installed the driver.  However, the driver does not install completely until the USB is connected.  Afinia says do not connect the USB cable until the driver is installed.
Once installed, the driver looks similar to the Neuralabel 300x and Primera LX2000 driver.  Both printers use HP print engines; so that makes total sense to me.  Read my earlier post on the LX2000 here:   


And 300x here:


Next, the instructions gave me information about the media.  Narrowest width is 2”; and shortest label is 2”.  A 2” x 2” label is pretty large for the minimum size.  Afinia hopes to reduce the minimum size to 1.75” x 1” shortly.  And the widest printable label is 6”.  The printer uses a 3” core, and a max OD of 6”.  I then installed the media on the unwinder which was a lot easier than on the VIP 495.  Read my post about this printer here: 


After inserting the paper, the printer pulled the label media into the printer and found the gap.  I then printed my first 6” x 4” matte poly label.  My first print took exactly 1 minute.  And I did lose a label on my first print as the printer had to find top of form.  Here is my first print on a matte poly coming out of the printer:

L301 First Print
L301 First Print
As you can see, my right side was printing on the liner.  To adjust this print start position, I had to simply add space on the “Left Offset” in the driver, found on the “Settings” tab.

L301 Driver Setting Tab

On my second label, the time to print was cut in ½.  Slightly less than 30 seconds to print a 6” x 4” label.  And the Left Offset adjustment worked! Notice the difference in the location of the ink on the right side of the printer.

L301 Printed Labels
L301 Printed Labels
To cut, I just moved the cutter across the path of the web.  Worked great. Looking at the cut position, I noticed I would want to add about a 1/16” of an inch.  The cutter adjustment in the driver enables this configuration; but does not say which direction is positive or negative.  I’ve learned later that positive ejects the labels out further.
Next, I printed gloss paper labels.  First I used a 6” x 4” label with a .25” gap and blackmark.  When I tried to print, it would not work correctly.  After thinking about the problem, I realized the blackmark was directly in the gap; and may be fooling the gap sensor.  When I changed to blackmark, the gloss paper label printed as expected.
However, the printed label had two issues.  First the print output had lines.

L301 Label Needing Alignment
By completing an ink cartridge alignment, the lines disappeared.  Look at the Cyan block pre/post alignment.

L301 Alignment
L301 Alignment
I’m not surprised by the fact the cartridges require alignment when you first use the printer.
Second, the black ink came off the gloss paper I tried first.  Look at the barcode in the downspout label above.  As the black is a pigment ink, gloss is a harder match.  I tried our standard gloss paper; and it performed much better. The black ink did not smear.

L301 On Gloss Paper
L301 On Gloss Paper

And the gloss poly printed very nice.

L301 On Gloss Poly
L301 On Gloss Poly
And I found the gloss poly labels waterproof; I was surprised by this result.

L301 Water Resistant Gloss Poly
On the matte paper labels, I found the material printed OK using the standard settings.

L301 Printed On Matte Paper
Although both barcodes scanned, I though the print quality could be better.  The colors and text looked very nice, however.
On clear film, I thought they printed great.

L301 Black
L301 All Black on Clear Film

But the ink came off easily in water.  Not really an option.
As for ink costs, the L301 is much more expensive than the C3500 or especially the C7500.   For example, this artwork at 5.5” wide would cost ~$0.14 to $0.16/label.

On the LX2000, the ink cost of this label would cost approximately $0.05.

LX2000 Ink Cost
LX2000 Ink Cost

And the ink cost would be only $0.024/label for the C7500G at 4.25” wide:


According to Mike Atkins, Sales Manager for Afinia, “The Afinia Label L301 Color Label Printer is perfect for small and growing businesses. By printing In-house and on-demand, you give your company the flexibility to change your labels as-needed; to accommodate branding, ingredient, or government regulation changes. Powered by an HP thermal inkjet printing technology, the L301 will work well for small businesses wanting to print labels on demand.”
For the positives, the L301:
  • Costs much less than competitive printers.
  • Makes label printing easy to do.
  • Prints great looking labels up to 6” wide.

As for the negatives, the L301:
  • Uses expensive ink.
  • Prints very slowly.
  • Does not offer a networking option.
  • Limits gloss media to selected options

Overall, I found the L301 as an affordable option to print low volume quantities of labels wider than 4.25” wide.  At $1,595, the L301 is under ½ the price of the LX2000; the competitive option.  You can purchase a lot of ink for $2,000+ dollars.  For those businesses printing 10 to 20 labels per day, who need wider than 4.25” labels and want to limit their investment, the L301 is a good option.
If you are interested in learning more about the L301 or any other label printer, contact us to discuss your requirements in detail.
Guy Mikel
855-962-7670

Seattle Cannabis

While traveling in Seattle, I had the opportunity to meet two of our customers in the cannabis market: Green Rush Cannabis and Georgetown Cannabis.


Green Rush Cannabis, http://catchtherush.com/,   is a WA i502 producer-processor located in the scenic Snohomish Valley. They produce a clean, sophisticated crop that has become a preferred brand for a number of top shops in Washington state known for their consistent terpene flavor, high quality, and deep impact.  GreenRush Cannabis is a recommend brand by expert budtenders.

Green Rush Cannabis
Green Rush Cannabis
Personally, I found Green Rush’s growing rooms, very clean and professional.
Mark Flanders, owner of Green Rush Cannabis, and I first met at Cannacon Seattle in February 2017.  At the time, Mark was looking for a means to print labels for their products with their logo, text and variable data.  Initially, Mark was looking for 4×2” and 3×2” matte or gloss paper labels produced on an affordable color label printer.  Based on these requirements, I recommended the C3500 printer.

Mark Flanders, Green Rush Cannabis
After initially testing the paper, we found the labels “flagged” and came off the joint tubes. This flagging is not a result of the adhesive, rather the memory in the paper.  Based on these results, we switched to matte poly labels that have less memory and work better on the tubes.

Green Rush C3500 Label
In our discussions, I learned that Green Rush uses Grow Flow, https://getgrowflow.com/traceability and sales system.  According to Mark, “to produce our labels, we requested GrowFlow to design our label templates.  Inside GrowFlow, the variable data is pulled and sent to a format that is produced as a PDF.  This system works great for us”.
The Green Rush label artwork is perfect for the C3500.  It’s a basic white label with a logo, text, barcode and variable data.  For this application, the C3500 works great.  And the integration with GrowFlow is a great addition, adding value to their customers.

Based on their success, Green Rush is expanding.  Mark says, “We’re setting up another location, to cultivate as well extract.”  Based on my experience, I can see why Green Rush is a success.
Georgetown Cannabis Company, http://georgetowncannabisco.com/, experienced team is passionate about the cultivation of their naturally grown cannabis.  They trim their buds to ensure quality and bag appeal.  Georgetown cultivates cannabis as natural as possible, and staying away from pesticides with the use of beneficial insects. Though innovative growing methods and their no shortcut approach, Georgetown strives to bring their brand, “Legion of Plume” of high quality, cannabis to their customers.

Georgetown Cannabis
Georgetown Cannabis “Legion of Plume ” Label
I met Mark Brown, CEO, of Georgetown Cannabis originally via one of our partners.  Initially, Mark was looking not only for a label printer, but a label applicator as well.  Mark and his team, especially, Kendall Brown, were requiring a high resolution printer for labels for their “Legion of Plume” branded products.  Based on their label printing requirements, Georgetown purchased a C7500G printer and matte poly labels.  I recommended matte poly given Georgetown’s production of a lot of prerolls, labeling their joint tubes.

Georgetown Cannabis Prerolls
After getting some gloss poly labels to test, Kendall decided to switch away from matte.  “We really like the way the colors look on the gloss poly”, says Kendall. Continuing, “We have found the gloss poly labels don’t flag, adhering to the tubes well”.
C7500G Preroll Labels

With a background in design, I really like how Kendall has produced the labels for Georgetown, maximizing the print output from the C7500G.  She is using the Epson ColorTone Matching assistant to help her chose the best color range for labels for Georgetown’s new hybrids.

C7500G ColorTone Matching Assistant Print Output
You can download the ColorTone Matching Assistant here: https://download.epson-biz.com/modules/colorworks/index.php?page=prod&pcat=35&pid=219

And I think these labels designed by Kendall and produced on the C7500G look great!

C7500G Printed Cannabis Labels
And Georgetown’s business is growing. According to Mark, “we’re growing, adding new dispensary customers all the time.  The branding and labeling of our premium products is helping our sale team grow our business”.
Green Rush Cannabis and Georgetown Cannabis are approaching their labeling differently; but both are successful in the marketing, branding and labeling of their products.  If you need help to insure your labels represent and promote your brand successfully, contact us.  We’ll help you find the best solution for your print on-demand color label requirements.
Guy Mikel
855-962-7670

“GE”–NOT “G”

As of August 1st 2017, Epson will no longer sell the C7500G printer.  They announced end-of-life for this part number earlier this July.


C7500G
C7500G

I first wrote about the C7500G in July of 2015:


And wrote about one of our first customers, NIC Industries, using the C7500G:


Instead of the C7500G, Epson will sell the C7500GE.  The “GE” is a printer bundle: including the C7500G printer, a single user license of Wasatch SoftRIP, one year of on-site service for the printer, and 6 months of free support for Wasatch SoftRIP.  Learn more about the GE printer bundle, including the Wasatch RIP here:


With the SoftRIP, you get better color control; especially important when trying to color match.  For example, you may use it to match specified Pantone numbers, to match more closely the color printed on a label to the original artwork.  However, you don’t have to use the SoftRIP to print to the C7500G.  You can print to the C7500G from most if not all Windows based applications.

Wasatch SoftRip Label Edition
Here is information from Wasatch on their Label Edition: 


For an incremental $955 for the C7500GE versus the C7500G, you get 1 year of on-site service valued at $1,029 and the Wasatch SoftRIP valued at $1,200.   Even with just the on-site service, the GE bundle is a great deal.
Personally, I believe the SoftRIP is best suited for professional printers; those individuals experience with using other RASTER IMAGE PROCESSORS (RIP) from other printing applications.  Although not difficult, using the RIP is different than printing directly from a PDF and other Window-based software programs.
So beginning August 1st, you’ll be able to purchase only the “GE” version.  But some of you may not want or need the on-site service or the RIP software.  If so, please contact us know to order your C7500G before the price goes up.  Or purchase from our store here:


Don’t forget to add 2 years of Extended Warranty with the “G”:


And a spare set of ink:


And a spare maintenance kit:


If you prefer to get the C7500GE with the one year on-site service and Wasatch SoftRip, purchase in our store here: 


Or contact us if you have any questions around printing color labels on-demand.
Guy Mikel
949-680-7840

Direct Thermal Changes

If you use Direct Thermal Labels, you may know this already; the price of direct thermal labels and POS paper has/will increase substantially. 

For example, Jujo Thermal announced an 8% to 13% increase.

And Lecta announced an 8% to 10% increase;  After a 7% increase in May


As I understand, this latest price increase results from the closure of a Chinese chemical plant, Connect Chemical, that makes 30% to 35% of the world market for leuco dyes, one of the major ingredients for the manufacturer of direct thermal paper. 

This closure is a result of the Chinese government attempting to clean up the pollution affecting their country.  It seems China has closed 10’s of thousands of chemical plants in an effort to improve their pollution.   

Leuco dye is one of the 4 major chemicals used in the manufacture of direct thermal paper.

What was news to me is that thermal paper uses Bisphenol A (BPA) and Bisphenol C (BPC) which when combined with the leuco dye makes the color when heated.  Recently, BPA has been identified as an endocrine disruptor.  

Heating of the direct thermal POS paper and labels appears to expose the BPA more to people handing these materials.  From Wikipedia:

People who often get in contact with BPA coated receipts do have a higher level of BPA in their bodies than people with average contact. 
In addition to the production issue with the leuco dyes, the largest domestic manufacturer of thermal paper filed bankruptcy:  Appvion.

The combination of these two events has caused the price of direct thermal paper and labels to increase substantially.  Over one million tons of direct thermal paper are used each year. 
With the price increases, now may be a good time to switch away from direct thermal labels to a better, safer alternative that enables color. And the costs may not be that different.  Some time ago, this post explored the cost differences among label printer media:


At Color Label Solutions, we sell two, inexpensive options for producing colorful inkjet labels to replace direct thermal printers.  First, we sell the ClariSafe printer, which prints labels up to 2.5” wide. 
ClariSafe Color Label Printer

Learn more here:

Watch this printer produce labels direct from a browser:


At less than $700, this printer produces great looking labels. Perfect for adding color symbols/icons on POS paper or labels.
To replace direct thermal shipping or warehouse labels, consider the C3500; perfect for adding color images to 4” wide shipping labels.

C3500 Color Label Printer

Here is an earlier post about increasing the ROI from shipping labels by using color:


Even three years ago, the price difference between direct thermal and inkjet coated or even uncoated labels were not much. Pleasant Mattress replaced direct thermal printers with C3500 printers to produce color-coded labels.

You can purchase the C3500 here.

With the big increase in prices of direct thermal label media, maybe you should consider switching to a better, safer and more colorful label option.  We can help you with two affordable printer options; and the labels to go through these printers.  Contact us if you would consider moving away from Direct Thermal printers.
Guy Mikel
855-962-7670


Meet Lacy

Meet Lacy, not only the Controller for Color Label Solutions, (www.colorlabel.solutions),

Lacy With Her C7500
But also the person who prints samples for our new customers.  Let me tell you more about Lacy and her printing responsibilities.
After joining us this year, Lacy began to work immediately to learn the business.  As we send print samples out to customers and prospects almost every day, Lacy came to see how important this activity was to our business.  While I was traveling, Lacy asked if she could help with printing label samples.  When asked why she wanted to learn this aspect of the business, Lacy said, “To gain a more rounded knowledge of the company, and understand better the products we offer.”

So of course I said great; and left almost immediately on a trip after spending a few minutes with Lacy on how to produce labels with the different printers.  She did work with Tim, our Support Manager, to some degree as well.  But according to Lacy, “to learn how to print labels, I read user manuals, watched YouTube videos and just learned from trial and error.”.

One Of Lacy’s Printed Labels
On this project, Lacy printed thousands of labels for a customer.  Watch the video of the labels printing.  Very fast, full-bleed and high print quality.


So far, Lacy says the easiest aspect of label printing was using the C7500.  “The C7500 seems to just be a much more user friendly printer, at least for a novice like myself”, says Lacy.
And the most difficult I asked?  I remembered her frustration with the L301 at first.  What was difficult about using this printer? Lacy says, “Initially, I had some technical glitches from learning on the fly.  Most of the issues were getting the artwork aligned properly on the labels.  Once I figured out how to print full-bleed labels on the L301, it was easy to do.”

To read about using the L301, read here:

http://colorlabelsondemand.blogspot.com/2017/02/l301.html


To make your full-bleed label printing easier, read here about what we did for this customer:


Having Lacy able to print label samples and runs for customers and prospects has been a great relief for me and our company.  Plus all of the staff tell me she prints labels swearing a lot less than I do! (OK, network issues drive me crazy when I’m trying to get samples shipped prior to the end of the day).

Lacy’s new found skills at label printing demonstrate that anyone with some dedication and patience can learn the technics around printing color labels on-demand.  Let us help you begin printing color labels on-demand.  You’ll find it easy as well.
Guy Mikel
855-962-7670

Visit our store here:  https://colorlabel-solutions.com/shop/ 

#1 Trend In Labeling

In the spring of 2014, I wrote about Loftware’s annual survey of customers and their perception of changes in the future; especially involving print on-demand color labels.  Loftware, Inc. (https://www.loftware.com/)  is the global market leader in Enterprise Labeling Solutions with more than 5,000 customers in over 100 countries.

Loftware Color Labeling


In their 2013 report, they predicted a significant growth in print on-demand color labeling.  Read about it here:  http://colorlabelsondemand.blogspot.com/2014/04/enterprise-wide-color.html

In their latest 2016 survey, Loftware predicts a very large increase in color label printing.  Here you can watch their webinar specifically on this technology:  http://resources.loftware.com/Reduce-cost-overhead-color-label-printing-Thank-You.html

Or download the survey here:


Watching this webinar, you will find all the reasons to begin using the solutions we sell; and validates the Color Label Solutions business model.  The number 1 trend was the move to printing color labels on-demand.
Two key findings from this survey are as follows:
  • 90% of their customers believe color label printing will become more important
  • 60% of their customers plan to purchase color label printers.

WOW!  That’s a new buyers for the solutions we sell!
According to Loftware and their survey, the reasons driving this tremendous increase in color label printing are as follows:
  • Complying With Government Mandates.  If you following this blog, you’ve read about GHS (Global Harmonized System of Classification and Labeling of chemicals) and the importance of color label printing.  In fact, we have currently 60 posts on our blog featuring GHS.   California Prop 65 warning is another example of a regulatory mandate that may require manufacturers to print color labels on demand:


  • Improving Brand Management.  Companies are placing more value on their brand; and want to convey their unique brands throughout the supply chain consistently. Also, color enables companies to distinguish between product lines/models/sizes quickly and easily across multiple languages.
  • Eliminating Preprinted Labels.  70% of Loftware’s customer use preprinted labels.  But preprinted labels come at a cost; Obsolescence, Storage, Lack of Design Flexibility, Process costs, etc.  Print on-demand color enable companies to print at the last possible moment, to enable design flexibility and reduce/eliminate label waste and storage.
Listening to Loftware’s webinar it’s clear; companies are learning the branding importance, cost savings and process improvements in moving to on-demand color.  That’s why Loftware created the native drivers for color label printers now available in their software.  Loftware offers drivers for Epson, QLS, CAB and even PCL based laser printers.  According to Loftware, native drivers simplifies deployments, enables large scale deployments, reduces network traffic (large data print streams) and optimizes printer performance.  Loftware seems to be on-board the color train!

Also, during the webinar, Loftware referenced a blog post written by Richa Groupa of VDC. VDC (http://www.vdcresearch.com/ delivers in-depth market insights to technology vendors, end users and investors across the globe; featuring reports in the AIDC market including label printing.  


VDC Color Label Printing

In her post,


Richa states their research showed 40% of their end user respondents use print on-demand color labels in their operation.  Although the perception that color costs more, preprinted labels create a lot of waste accounting for 9.3% of all label purchased. This waste along with all of the Branding, ID and Compliance benefits mentioned earlier will drive more companies to print on-demand color labeling.


My thanks to Maureen Perronil and Jessica Hutter of Loftware for their outstanding webinar.
If you are considering deploying Loftware and/or color label printers, contact us to help you decide how to proceed.  By focusing exclusively on this market, Color Label Solutions is your premier provider of systems to help you print color labels on-demand.
Guy Mikel
855-962-7670

Edibles Packaging & Labels

DISTRICT EDIBLES (http://www.districtediblescolorado.com/) is a quality, artisan crafted edible line now available in Colorado and other states. All edibles are created in small batches, with Ultra-premium CO2 extracted cannabis oil. Consumers will feel the difference in the quality and consistency of our products so you can really redefine your high!

District Edibles Packaging & Labels


Recently, I asked District Edibles to talk to the PR agency for Epson and the Printing News about labeling in the cannabis market.  Based on this request, the Packaging News published this article that featured our customer and myself.


In the article, Lauren Gilligan from District Edibles said the following:
District Edibles is another brand that is seeking to set itself apart, using packaging to help it stand out from the crowd. “When it comes to label design and packaging, we look for something unique and appealing,” said Lauren Gilligan, vice president of sales & marketing. “In order to stand out in a cut-throat market like Colorado, we look for the initial look of the product. Is it eye-catching? With so many brands on the market, it is really important to have curb appeal in order to captivate the consumer. The next feature we look for is texture. Is there a particular feel to the label? It stimulates another sense for the consumer, and makes your product a lot more memorable. Since we work in cannabis, safety also plays a big role in our package design. Packaging needs to be functional to make sure it doesn’t get into the wrong hands of children or pets.”
And I got my comments in the article as well:
“Three key requirements are driving cannabis manufacturers and processors to the use of on-demand color labels,” agreed Guy Mikel, president of Color Label Solutions, reseller/partner of the ColorWorks on-demand inkjet label printers. “First, companies in the cannabis business must comply with the state requirements, which keep changing. As most states require a variety of variable data such as serialized package tracking, lot or batch identification, and/or THC or other component testing results, companies need to include this information on their packaging. Printing this information on the label is the most efficient means to meet this requirement. Second, companies are developing new products. As new SKU’s are tested and developed, label content evolves. An on-demand color label makes changes easy to do. Third, branding is a key component of the marketing of cannabis products, especially as the market moves into the recreational segment. Manufacturers want and need to convey their product attributes and product positioning in a retail setting. Great looking color labels on-demand help marketers project a premium product image; which is what District Edibles has achieved with their products.”
Overall, I like to thank District Edibles for participating in this article featuring the customers of the Epson label printers. Also, I’d like to comment on three aspects of the packaging District Edibles is using.
First, District Edibles prints their labels full-bleed.  It’s not easy to print 100% of your labels full-bleed.  The media guides in the C7500 make it relatively easy to print the edges of your die-cut labels with ink.  This post documents my feelings on the media guides in the C7500:


District Edibles Packaging & Labels
Second, District Edibles prints their labels in black.  Black is the most difficult color as you can see any “imperfections” in the print.  This previous post explains the difficulty in printing all black:


Third, District Edibles is using a package we sell; the MPack.  This child-proof, tamper-evident, and water/air tight container is great to meet the regulatory and product requirements for edible cannabis products.  Plus we’re producing the MPack in black for District Edibles, giving them a unique look.  In this previous post from our participation in the Seed to Sale tradeshow, I discuss the MPack:


It’s great to have customers like District Edibles; as they grow in this brand-new market.  If we can help with the labeling of your edible or other products, be sure to contact us.  We’d love to have more great customers like District Edibles.
Guy Mikel
866-962-7670

Label Expo Europe 2017

This week, I attended Label Expo Europe in Brussels for the first time.  Although I had attended Label Expo in the US several times before, I found this session much more valuable.  Let me share with some of the new, exciting technologies I saw in the print on-demand color world.

Guy Mikel at Label Expo Europe 2017
The most exciting new technology I saw at Label Expo did not involve labels; rather corrugated.  Beautiful, On-Demand, Color Corrugated.

Inkjet Coated Corrugated Printed with the NS Midi
Inkjet Coated Corrugated Printed with the NS Multi
New Solution (www.newsolution.euwas showing inkjet coated corrugated printed with the NS Multi Corrugated printer.

At approximately $100,000, this printer is not inexpensive.  The NS Multi uses 5 Memjet print heads to print up to 42” wide corrugated; very quickly.  Watch this corrugated printer in action:


Here is a picture for the loading table:

NS Multi
NS Multi
Using the inkjet coated corrugated created by New Solution, you can now produce cartons for all of your products on demand.  To make this system work, you flood-coat print the boxes with the inkjet coating, then form the box, and then print.  Box manufacturers should be able to produce the inkjet coated material as it’s no different than flood coat printing.  Once the box is coated, the NS Multi produces great looking boxes.  I was very impressed.

NS Multi Printed Box
For those regular readers to this blog, you may remember our work in print on-demand corrugated:


This new technology opens packaging to the same drivers as on-demand color label printing.  With all the SKU’s, now you can produce the boxes you need, when you need them.  On-demand cartons offers significant cost savings in both reducing obsolete inventory and improving processes.
In addition to the new corrugated technology, Okidata launched the new Pro1050 color LED label printer.

Okidata Pro1050
Okidata Pro1050
The Pro511 uses new technology to print compared to most LED and laser printers.  This technology offers better color registration and narrower/shorter labels as well as no waste of label traveling through the printer at the end of a print job. 
  • .83” to 4.95” Print Width
  • .5” to 52” Print Length
  • 6” per second
  • 1200 x 1200 DPI
  • 60 KG (no on-demand demonstrations at this weight)

Plus this technology produces great looking blacks and even white colors on a wide variety of substrates. Notice how black is the print. 

Pro1050 On Clear Film
Pro1050  Black On Clear Film
Pro1050 White on Clear Film
Pro1050 on Silver Metallic
Pro1050 on Antique Beer Label
Now, very clear film, metallic, bright gloss synthetic, inexpensive films and other materials will be available for on-demand color printing.  And the printer toner costs will be priced competitively to inkjet ink according to Okidata.
However, Okidata will not make this printer available in North America initially.  I will keep you informed as I learn more of their plans.
Although we’ll not be able to sell the new Pro1050, we’ll start selling the new L501 as soon as it’s available approximately February 2018.

L501 Color Label Printer
With an estimated list price of approximately $3300 (official price has not been set as yet), this 8.5” wide color label printer produces great looking labels; in both dye and pigment-based inks.  The L501 offers great flexibility in printing by changing the consumable printhead.  Need bright colors; use dye-based inks.  Need durable prints; use pigment-based inks.
Watch the L501 print wide labels here:


L501
Normal mode on the left; and draft mode on the right

The L501 is very comparable to the LX2000; but from my perspective better design in both the hardware and software.  The L501 uses a newer generation of HP print engine compared to the LX2000.  I’m very hopeful for the L501 for those companies who must print wider than 4.25” labels.  Compared to the LX2000 from Primera, the L501 should offer a better design, faster printing and maybe lower ink costs according to Afinia.
As the L501 gets closer to market, we’ll keep you informed on the availability of this new 8.5” wide label printer.
For professional printers and in-plant print shops, we saw the perfect companion device to the C7500GE at Label Expo; the Eclipse Mini Finishing Station from Impression Technology Europe:


Mini Finishing Station
At approximately $10,000, the Mini Finishing Station can laminate and die cut label up to approximately 4” wide at a price point much less expensive than other finishing stations available on the market.  Most of the other finishing stations start at approximately $25,000.  With the Mini, you can now print continuous labels, laminate and then die cut to the specific size you need.  No more ordering a wide variety of die-cut label sizes and then printing.  You can keep only one size in inventory.
Watch it run here:

 The Mini uses knifes (plotter type) to cut labels and not dies.  But given the mini is only 4” wide, the speed is not too bad.  Not fast; but not excessively slow.
With the Mini, you can now purchase inexpensive media; and then laminate to add durability or glossy finish.  And the Mini should enable you to lower your label costs.  Combined with the C7500GE which offers the Wasatch RIP for better color control, the Mini makes entry into the digital printing market easy for most any professional printer.  At a fraction of the cost of a digital press.
Another new hardware technology available at Label Expo came from Memjet; and both New Solutions and Trojan Label showed new versions of the above the web (media path) printhead technology.  The Atom from New Solutions:

Adam Color Label Printer From New Solutions
And the T2C from Trojan Label (now a part of QLS).
 

T2C from Trojan Label

Both of these units are high speed label presses; but in a smaller footprint.  And as I understand, both use the same above the web (media path) Sirus printheads making maintenance much easier than earlier designs.  I have a lot to learn about how these printers work before I comment more about the technology.
These new industrial designed color label printers will seem to produce thousands of beautiful labels. More interesting to me, is that I learned Memjet has launched a new print technology offering longer printhead life and pigment ink.  Read the press release here:


By next spring, we should see pigment-based printers from Memjet OEM partners; in a variety models.  With this type of great, new technology coming to market, the print on-demand color label business will continue to grow.
At the Neuralabel booth, I learned they were making a big change with their 300x color label printer.

Neuralabel 300x
Neuralabel 300x
According to Ken Lund, President, Neuralabel will begin selling a version of the 300x with a straight paper path.  In the past, the 300x has had troubles with label media jamming as it goes around the 3 turns in the printer.  By adapting the printer to use a straight paper path, the 300x should become a much better option for 8” wide label printing.  Perminate printheads, fast speeds and high resolution are key capabilities of this printer if the new design can prevent jamming in the printer. Read this earlier post on the 300x here:


In addition to new hardware, I found many new types of media for print on-demand color labels.
Wine labels that print great even with the low resolution C831 printer:
C831 Wine Labels
C831 Wine Labels
Imagine how nice these labels will print with higher resolution printers.
Or inkjet coated fabric labels for mattresses and carpets:
Inkjet Coated Fabric Labels for Carpets
Inkjet Coated Mattress Labels
And some great new material from my friend Franz Walter Pohlhaus. Die cut, matte paper visitor badges with adhesive backing that fold at the perf to form a thicker, stiffer badge:

Adhesive Backed Badges
Inkjet coated parking stickers with on-board lamination to protect from UV rays:
Inkjet Coated/Laminated Parking Stickers
Or inkjet coated, heat-sealed paper labels that form a package after printing:
Heat Sealed, On Demand, Inkjet Coated Package
Print On-Demand Direct Thermal POS Paper
Inkjet Coated POS Paper
Watch the C7500 print the back of direct thermal POS paper here:

Overall, the trip to Label Expo was very informative; and well worth my time and money.  All this new technology makes me excited by the prospects for print on-demand color labels.  Contact us if we can help you with any of this new technology.
Guy Mikel
855-962-7670

LX2000 vs C7500

Recently, I’ve been asked, “What are the differences between the C7500 and the LX2000?”  Frankly, this question is coming from people who do not want to spend the $8500 or more on the C7500; but want good print quality.  The LX2000 is a lot less expensive and can print up to 8″ wide labels.  In this post, I’ll explain my view of the 10 biggest differences between these two color label printers.


Before I start, you may find my initial post on the LX2000 of interest:

http://colorlabelsondemand.blogspot.com/2015/06/lx2000-full-bleed-color-label-printer.html

On our blog, I found 38 different posts on the C7500.  Here is my first post on this printer:

http://colorlabelsondemand.blogspot.com/2014/09/first-review-tm-c7500-at-label-expo.html

Now the 10 biggest differences between the LX2000 and the C7500

Print Quality:
With a max print resolution of 4800 DPI (https://www.primeralabel.com/lx2000_specs.html), 

the LX2000 can print great looking labels.  At the highest settings, you can produce great lookihng labels.  But with 1200 x 600 resolution

(https://epson.com/For-Work/Printers/Label/ColorWorks-C7500-Inkjet-Label-Printer/p/C31CD84011),  

so can the C7500.  Top is C7500 and bottom is LX2000; both are at the standard settings.  See how the blue in the top of the picture (C7500) is darker, richer.


C7500 (Top) vs LX200 (Bottom) Print Quality Comparison
Ink Cost:
The ink cost in the LX2000 is much higher; but not as much as I expected for this artwork at normal settings.  Using this label artwork, the LX2000 ink cost is estimated at $0.069/label versus $0.049/label for the C7500.  $0.02/label more. These estimates are at normal settings.  To get a higher print quality, many companies would be forced to run the LX2000 at a higher print quality setting.  Therefore, I believe in reality the ink cost difference would be much higher.
LX2000 Ink Cost/Label
LX2000 Ink Cost/ 4″ x 6″ Label
C7500 Ink Cost/Label
C7500 Ink Cost/4″ x 6″ Label

Yield per cartridge.
LX2000 vs C7500 Ink Cartridge Comparison
The LX2000 ink cartridge is much smaller than the C7500.  Therefore, yields are much lower.  In the above example, you would get 1094 labels/LX2000 Cyan cartridge and 9,085/C7500 cartridge.  Almost 9X more.  Magenta and yellow are about the same difference.  Black is only 2X as the black cartridge is larger in the LX2000.
Printhead:
The LX2000 uses consumable printheads.  You’ll need to spend $250+ for a printhead occasionally when printing large volumes.
Speed:
The LX2000 is very slow compared to the C7500.  Watch how long it takes to print one label.  In the video, the printer just finished cutting one label. Overall it took about 5 minutes to print 10 labels for the ink calculation at the normal setting.  At the high print quality setting, the speed would be much slower.


And here is the C7500 printing 10 copies of the same label artwork:


Relatively, the C7500 prints much faster than the LX2000.
Rewind:
The C7500 offers a built in rewinder; the LX2000 does not.  Watch the C7500 print and rewind 100 4” x 6” labels in 1 minute.


Button Push:
The LX2000 uses a series of button pushes that I still don’t understand.  I believe you can get 20+ different actions based on these three buttons.

LX2000 Buttons to Push

Design:
The LX2000 is a HP printhead inside of a metal box. I find the design finicky.  In fact, I cut my finger printing the 10 labels required for the ink calculation.

Inside the LX2000
Inside the LX2000

The inside of the C7500 is well designed; especially the media path which prevents side-to-side movement of the label media.

C7500 Media Path
C7500 Media Path
Label Roll: the LX2000 has a max OD of 6”.  The C7500 has a max OD of 8”.   Larger rolls mean fewer changes and lower label costs.
Support:
You’ll get a lot more support from us.  Here is an example of the type of support we provide that I published earlier:


FULL DISCLOSURE: I find Primera difficult to work with.  For sure, Primera does not want resellers like us as partners as they prefer to sell direct to consumers.  For our customers, we’ll provide technical support; and we’ll help you negotiate the repair processes of our vendors.  We work hard for our customers.
I hope these 10 aspects explain our view of the differences between the C7500 and the LX2000.  I understand hardware cost is important; but you sometimes get more value by investing a bit more money.
If you have questions comparing label printers, call us. We’ll be happy to gain an understanding of your requirements and recommend the best label printing solution for your organization.
Guy Mikel
855-962-7670

New CA Prop 65 Requirements

For those of you doing business in California, have you seen this symbol?

New CA Prop 65 Icon
New CA Prop 65 Icon
Beginning August 2018, you will begin seeing this symbol everywhere in California with the implementation of the new Prop 65 warning labels.  Proposition 65 (California’s Safe Drinking Water and Toxic Enforcement Act of 1986) was implemented as a so-called right-to-know statute that requires everyone in the chain of commerce to ensure that California consumers receive “clear and reasonable” warnings prior to being exposed to a growing list of chemicals—now numbering more than 900.  In 2018, California’s Office of Environmental Health Hazard Assessment (OEHHA) has defined “clear and reasonable” to include the above warning symbol.  You’ll notice the difference.

New Prop 65 Label Requirements
To see the latest 900 cancer or reproductive compounds on the list, visit here:

Having worked in the crop protection industry for many years, I recognize many of the compounds.  However, one of the compounds on the list was surprising to me:
Marijuana smoke: 

With the changes coming to the cannabis business in January, I wonder how this warning will affect labeling prerolls, etc. in California.
Or aspirin:

A list of all the published fact sheets on each compound are here:

Also interesting to me, the new Prop 65 labeling requires specific font size for the warning; no smaller than 6 point font and/or no smaller than the largest font for consumer information on the label.  For more specific answers to questions, see this link:

You may say this new Prop 65 warning does not apply to us as our company does not sell directly to consumers.  In this situation, the manufacturer of a product that contains a compound on the list must notify their customers of the requirement.  Given the notification requirement, I don’t know if they’ll decide to place the warning on their labels as well.  That’s a question for the regulatory experts inside each company.
For our customers already meeting the requirements for GHS labels, printing this new warning symbol on-demand and in color will not be any big deal.  On our blog, www.colorlabelsondemand.blogspot.com,  we have 59 different posts covering GHS.  One of my favorite post covering GHS labels involved NIC Industries:

And Engineered Lubricants:

If you need assistance printing labels for products covered by Prop 65 and/or GHS contact us.  We can help you print color labels on-demand.
Guy Mikel
855-962-7670

Color Rebar Tags

Rebar (short for reinforcing bar) is a steel bar or mesh of steel wires used as a tension device in reinforced concrete and reinforced masonry structures to strengthen and hold the concrete in tension.


Rebar fabricators supply various grades, sizes and shapes to meet the requirements of construction projects.  Given all the types of rebar, construction sites need a means to quickly identify the correct bundle for each part of a project.  Color is the easiest method to identify rebar.  Let me tell you more about using on-demand color rebar tags.
Brooklyn Rebar (http://www.brooklynrebar.com/)  is a rebar fabrication company committed to serving contractors and warehouses in New York, Connecticut and New Jersey.  They provide fabricated rebar to complex, large and small bridges, concrete high rises, tunnels, treatment plants, power plants, ranging in size, from 1 to 10,000 tons of rebar.  Brooklyn Rebar is located on the Brooklyn/Queens line with easy access to all east side tunnels and bridges into Manhattan.

In January 2016, a Project Manager, of Brooklyn Rebar contacted us to discuss how they could print color tags for their rebar.  During our conversation and subsequent work together, I learned that Brooklyn Rebar uses Soule Software, (http://www.soulesoftware.com/),  which offers a complete suite of software for rebar fabricators and placers.  In their software, Soule built the capability to use color in their customer’s operations.  According to Bob Boeving, Vice President of Sales for Soule Software, “Color has become a very valuable tool for rebar fabricators.  Now fabricators can add color bars to their tags to help the job site stage and locate the correct materials for each specific part of a project.  Fabricators can set up unique colors for each section of a project, which print automatically.  This color capability helps contractors reduce errors and increase productivity on the job site.”

Bob continues, “color on-demand tags helps fabricators as well to stage, load and offload rebar correctly.  With color, fabricators can pull off the truck rebar in the correct sequence.  In addition, our software enables the use of images to show unique dimensions or bends in the rebar.  These images help the fab shop understand what’s required to reduce potential errors.  We can also use color to identify foreign or domestic steel; and to identify different grades of steel.  This color identification helps the fab shop pull the correct steel inventory for their job. Overall, color on-demand tags are a powerful tool to help reduce errors in a rebar operation.”
Based on the capability of the Soule Software, Brooklyn Rebar purchased a C7500 and 4” x 6” matte poly tags. 

Print On-Demand Color Rebar Tag
 Initially, we had issues with the tags.  First, we learned the C7500 can’t use standard shaped tags; tags with a notch for thermal transfer printers to detect top of form.  When the printer pulls the tags back into the printer to start printing, the notches catch causing the printer to error out.  Second, we tried new material with a shinier back.  Although the tags would work in a C3500, they would not function in a C7500.  It seems the C7500 has a substantially different blackmark sensor.  The reflection on the back of the tag caused the printer to misread the blackmark.  Third, we tried a thinner, 5 mil poly tag.  Although durable, the 5 mil tag could tear at the notch, potentially losing the tags during shipping or moving in the yard.  Because of these problems, we had supply issues, getting the tags to our customer.  One aspect of the 5 mil tag; they print great!

5 Mil On-Demand Color Tag
(FYI:  We featured this same tag material in our post on mattress tags)  http://colorlabelsondemand.blogspot.com/2017/06/on-demand-color-mattress-tags-labels.html

Through all these start up issues, Brooklyn Rebar stayed with us.  And we appreciated their support.  Ultimately, we settled on an 8 mil, matte poly tag with the design in the image above.  And these thicker 8 mil tags seem to be working well.
Print On-Demand Color Rebar Tag
During a recent visit, a Project Manager for Brooklyn Rebar, showed me how they use color in their operation.  According to the Project Manager, “we assign colors to specific areas of the project, using the Soule Software.”

Rebar Staging Document
Color Rebar Staging Document
“And in the software, it’s easy to pick the color for each section of the project”, said the Project Manager.

Soule Software Color Selection
 “We use both solid colors and different color hash marks for each of the locations on a project.  For most projects, the solid colors are sufficient.  When we need more locations, we use different color hash marks.  We find the color coding helps our customers and us internally to reduce errors and increase our productivity”, said the Project Manager.
After working with Brooklyn Rebar and learning more about Soule Software, I do believe automating color codes on tags will help fabricators significantly.  Plus I like the fact that Soule built in the capability in advance of available technology; specifically the C7500.  Even today, I know of software applications that have been built using printing languages from the 1980’s.
And more importantly, I appreciate companies like Brooklyn Rebar who search and use practical technology that improves their productivity and reduces the potential for errors.
If you need a color-coded label or tag solution for rebar or any other item, be sure to contact us.  We would enjoy working with you to build a color-based solution that fits your business.
Guy Mikel
855-962-7670

Summer PR Tour

Recently, Andy Scherz, Product Manager for Epson America approached us with a request. Andy asked:
“Do you any customers who might like a little PR?  We are focusing on the boutique product labeling market.  Cheese, juice, lotion…  The idea is that we would like to get some quantity of actual product with labels.  We will show these labels and highlight how they were printed by Epson solutions.  If you have any willing customers, please let us know.”

It seems Epson America was planning for the annual Epson Summer Press Tour. 

ColorWorks Label Press Tour
The Epson Summer Press Tour is an annual event that Epson PR conducts for press and analysts to showcase new solutions and corporate initiatives.  This event is not open to the public and is by invitation only to industry analysts and members of the press. And this year, over 100 press and analysts attended in New York City. 
Originally, this event was created and remains primarily for media to see Epson’s latest consumer products for Holiday Gift Guide inclusion.  In the last several years, Epson has shifted its company focus toward business solutions and leverages the event to generate larger brand awareness for Epson solutions that may not be as well known.  For this reason, Epson incorporated displays from more industrial business lines at the event such as robotics, point-of-sale printing and commercial label solutions.

How could we say no to Andy?  Based on this request, we suggested to Darek Connole, Public Relations for Epson a handful of customers who produce their product labels using Epson printers.  Based on this list, the Public Relations firm for Epson, Walt & Company, www.walt.com,  purchased on-line a selection of products from these companies. 


ColorWorks Booth-Summer Press Tour
One the products/labels of company featured was Hummingbird Nectar.  Douglas Everett produces beautiful labels for his product; using his great graphic artist skills.

Hummingbird Nectar Products

Many years ago, I wrote about Hummingbird Nectar, http://www.hummingbirdmarket.com/on one of my first posts:


Since day one, Hummingbird Nectar has invested resources and energy into producing innovative hummingbird nectar and offering quality hummingbird products.  Over the past years their nectar has evolved; and will continue to change as this company introduce best-in-class products for your hummingbirds.
As Douglas says, ““The team a Color Label Solutions and Epson keeps us humming along”.
In addition to Hummingbird Nectar, Epson showed a product from Burn Hotsauce, https://www.burnhotsauce.com/,  in their display:

Burn Hot Sauce
Burn Hot Sauce

Burn Hot Sauce is an original, small batch, farmer and chef owned business in Santa Cruz California.  All of their produce is grown on sustainable organic farms in California; and all of the fermented hot sauces highlight the farm on the label.  Burn Hot Sauce is raw, alive and full of probiotics. 
​And I featured this company with some great products in a post earlier this year:


Next, we got one of our long-time customers, Tongue River Winery, http://www.tongueriverwinery.com/, involved.

Tongue River Winery
Tongue River Winery
 Their slogan, “Quality Made Wines with fruit exclusively from the Northern Plains!” sums up not only their wines, but also the quality of the owner of Tongue River Winery:  Bob Thaden and family.  You’ll find the letter Bob included with the box of wine to Epson of interest: 

Letter from Tongue River Winery

As Bob didn’t have to include this letter, it shows what a wonderful and kind man he is.
Also, Epson had products from Rejunvenation Therapeutics, https://rejuvenation-therapeutics.com/,   in their display.

Rejuvenation Therapeutics Label
Rejuvenation Therapeutics is a health-centered, science-driven company that strives to extend lifespan and improve overall wellbeing. Within a burgeoning field of dietary supplements and nutritional ingredients, Rejuvenation Therapeutics stands out with their dedication to scientific evidence and regulatory compliance to ensure that their products are safe, effective, and beneficial.
Rejuvenation Therapeutics is using a C7500G to produce their gloss poly labels.  I think they look great!
Lastly, Epson showed products from Miracle Botanicals, https://miraclebotanicals.com/one of our customers from Hawaii.

Miracle Botanicals Labels

Essential oil is the passion of Miracle Botanicals! Ever since Hope Johnson was introduced to essential oil after the birth of her third child, these precious plant spirits have become part of their family’s daily life and over time every aspect of their lives has been transformed.
Rev. Hope Johnson is an Essential Oil Alchemist and Reiki Master.  I love that she signs all of her emails to us, “With Fragrant Blessings”.
We’re fortunate to have such great customers like the one featured above.  Please visit their website and try some of their products.  Or if you have requirements for other food and beverage companies, contact us and we’ll connect you to some of our other customers.
I’d like to thank Epson and the Walt Company for the pictures from the event; and for including us and a few or our customers.  Contact us if you want to produce beautiful and functional labels yourself.

Guy Mikel
855-962-7670

Doob Tube Labels & More

Peter Howell from Great Engineering in Australia came to Color Label Solutions this week to provide additional training on their line of label applicators; especially covering small container labeling.


Color Label Solutions Team
If you don’t know this company, Great Engineering (https://greatengineering.com/) makes world class label application equipment.  Ideal for cylindrical containers for many industries: food and beverage, pharmaceuticals and cosmetics. And don’t forget the boutique beverage and cannabis markets.  Here is my previous post on the BenchMax applicator:


During our session, a few key points came out that I decided to share with you.  First, the economical BenchMate (https://greatengineering.com/benchmates/) offers the capability to integrate with a C3500 label printer.

BenchMate Integrated with the C3500

Although using a hand crank, this manual applicator can apply a lot of labels, quickly and affordably.  In addition, this manual applicator has the capability to apply 2 labels on one container, with very precise positioning. With the addition of the interface unit and foot press, you can print directly into the BenchMate, eliminating any requirement for rewinding.  I find this capability very intriguing; especially given the price of the unit.
The BenchMate plus the Interface, Cable, Footpress and Freight to the US from Australia as seen in the above picture costs $1990.  No other applicator at this price enables the printing of color labels directly into the applicator.
In you have containers less than 55 mm in diameter, the BenchMate+ offers the ability to apply labels to containers down to 17 mm (11/16”) in diameter. Be sure to watch this video of applying labels to very small bottles from the BenchMate’s webpage.  


The BenchMate+ with the small container adapter and overhead roller costs $510 more than the BenchMate; totaling $2,500 with the components to apply labels directly printing from the C3500.
Second, Peter worked with us to apply labels to tapered bottles.  Tapered containers, such as joint or “Doob” tubes, make label application very difficult; given the difference in diameter/speed of the container as it turns on the applicator.  For example, we are currently working on a label that is .6875” on the tapered end; and 1.125” on the larger end.  This .4375” difference is what makes label application tough.
Watch us apply a 2” x 1” label on a tapered joint tube with lip/lid.


As you can see in the video, the blue rollers of the small container adapter are moved to allow for the lip connecting the lid on top of the container.  These type of design considerations make the BenchMax a very flexible machine.
And here is another video of the same application providing more detail on how the system works for applying labels to tapered containers.


And in this video, we applied several labels on the same tube; to show how the BenchMax applies labels in the same position each time.


In this last video, you can see how we cut the rollers to better apply the labels.  Based on your containers, the BenchMax makes it easy to adapt the applicator for the type of container you have.  No other label applicator makes adapting to the container easier.  In this video, Peter from Great Engineering shows how to remove and cut the rollers to better fit your containers.


Third, the BenchMax offers an orientation capability.  With this feature, you can apply labels on a round container in precisely the same position on every bottle.  In our training, we used a Mason jar, and applied labels relative to the position of the embossed letters on the jar.  Wish I had pictures; bummer.
Based on our meeting, I’ve found the BenchMax a very interesting choice for applying labels to a variety of round containers; especially small container vials.  With the ability to integrate with the Epson printers, the ease of adapting to a variety of containers sizes and shapes, and the minimum sizes down to 8 mm in diameter make the BenchMax and BenchMate label applicators good choices for many companies.  Contact us to learn more how these devices will fit your operation.
Guy Mikel
855-962-7670

Complete Print Shop

Postmark (http://postmark-usa.com/) showed their new CMYK printer at the Franchise Services Expo July 27 and 28 in Long Beach.  Combined with their fixed feeder, Postmark calls their solution the Complete Print Shop.


CMYK Printer With Fixed Thickness Feeder
With the fixed thickness feeder, you can print a wide variety of items that are difficult to impossible to print with normal printers.


Watch the new CYMK printer and Fixed Thickness Platform run here:


And print Coasters:

On-Demand Color Coasters

Coffee Sleeves:

On-Demand Color Coffee Sleeves

Paper Bags:

On-Demand Color Bags
Thick Menu Cards or Shelf Talkers:

On-Demand Color Cards/Shelf Talkers
And other items such as envelopes, bubble envelopes, napkins, small boxes, etc.  Pretty much anything paper you can now print with the fixed thickness feeder and the CYMK printhead.
You may remember we showed an earlier version of this device at WestPack 2017:


and a slightly different version at WestPack 2016:


From my perspective, the biggest difference with the latest iteration is the software.  Now, Postmark has integrated the Navigator RIP from Xitron:


With this software, now you can print PDF’s easily; and get better print quality.  Plus the workflow seems much easier to use.  The Navigator RIP is a big step forward in ease of use of the CMYK print engine.
In addition to the new RIP, Postmark has reconfigured the printer; eliminating the need for hoses, wires and connectors.  This new configuration makes it much easier to set up and run.
The 4” CYMK printer, Fixed Thickness Feeder and RIP costs approximately $20,000.  The 8” version costs approximately $25,000.
If you need to print a wide variety of “thick” items; or you want to add a new source of income for your printing business, contact us to discuss how the CYMK print engine and Fixed Thickness Platform would work for you.
Guy Mikel
855-962-7670